
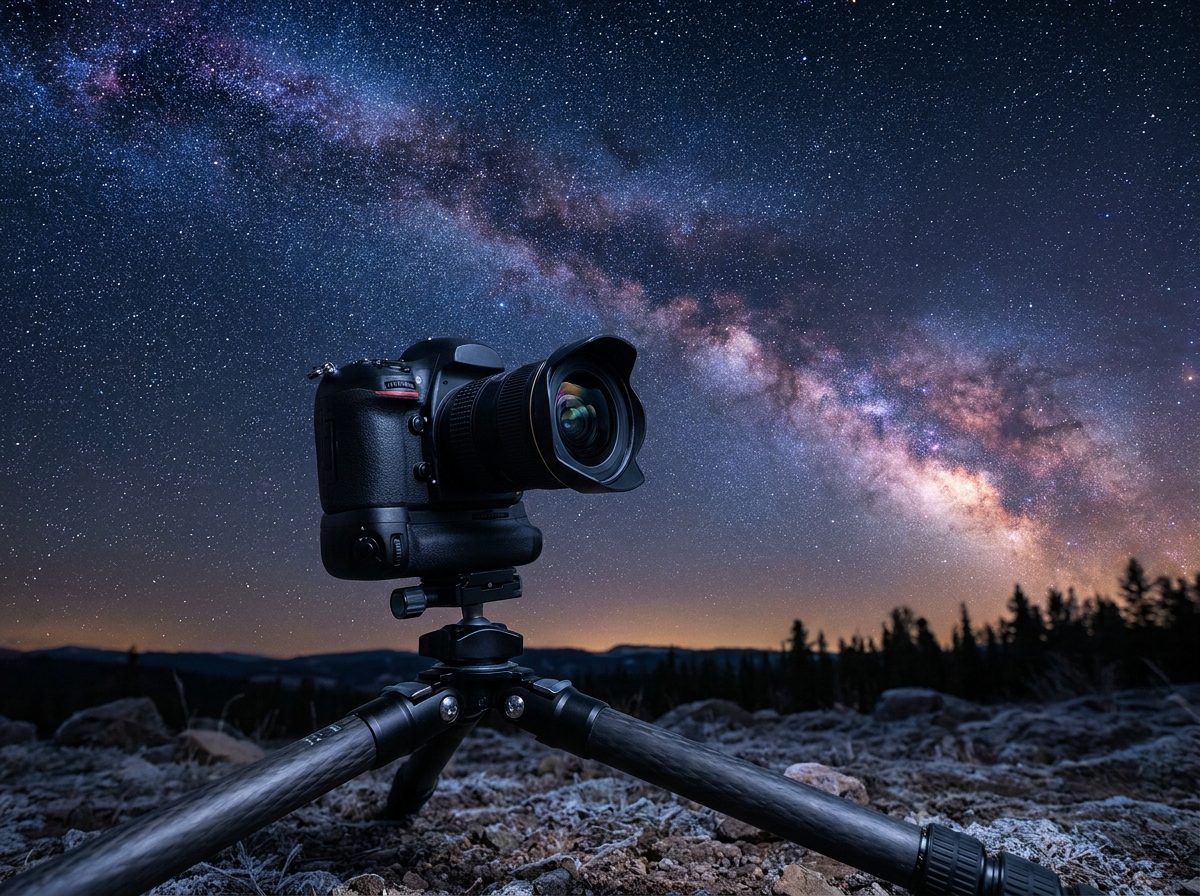
In short
- Capturing the Milky Way requires clean sensors at high ISO: used full-frame bodies like the Sony A7 II or Canon EOS RP are available for under 600 euros.
- A fast lens like the 14-24mm f/2.8 or a 24mm f/1.8 impacts the final image quality more than the camera body itself.
- The tripod must support 3 kg of weight for 25-second exposures: below 90 euros, you will only find unstable compromises.
- Typical realistic budget: 600 euros for the body + 400 euros for the lens + 200 euros for the tripod + 100 euros for accessories = 1,300 euros total.
The first time I pointed a camera at the Milky Way, in 2009, I had a Canon 40D and a 17-50 f/2.8 Sigma. The result: bloated stars, noise everywhere, and a magenta band on the edges. Today, with 1,500 euros of certified used gear, you get images that fifteen years ago were the domain of serious amateur observatories. The used market has made landscape astrophotography accessible in ways we never imagined.
In this article, I tell you what you really need to get started: camera body, lens, tripod, accessories. No astronomical theory, no generic shopping lists. Only concrete configurations with products we have in the shop today or that we see passing through the used counter in Ancona every week.
What astrophotography really demands from a camera
Landscape astrophotography is a discipline that pushes sensors to their limits more than any other genre. You work with few photons, long exposures, and ISO settings that no one would ever use in daylight photography. The final result depends on three specific parameters, and none of them is resolution.
Before looking at camera bodies, it is worth understanding what we are truly asking of the sensor when we point the lens at the Milky Way for a 25-second exposure at f/2.8, ISO 6400.
Sensor size: why full frame captures more light
A full frame sensor measures 36×24 mm, while an APS-C sensor is approximately 23.5×15.6 mm. The full frame surface area is 2.3 times larger. At the same aperture and shutter speed, it captures 2.3 times more photons from the same portion of the sky.
Translated into practice: an exposure that requires ISO 6400 to be readable on APS-C can be closed at ISO 3200 on full frame with half the noise. This is not marketing; it is geometry. The larger photodiodes of full frame also offer a greater dynamic range at high sensitivities, keeping dark zones readable where nebulae and galactic dust hide.
ISO invariance: what it means in practice for night shooting
An ISO-invariant sensor produces the same real-world noise whether you shoot at ISO 6400 in-camera or at ISO 800 and then raise the exposure by three stops in post. The analog gain is applied downstream, so you shift the preset without paying a penalty.
Why does this matter? Because in astrophotography, you often work in conditions where the histogram cannot be trusted. Shooting at a lower ISO and recovering in post protects the highlights of the Milky Way without blowing out the cores of the brightest stars.
ISO-invariant sensors typical for budget used gear:
- Sony A7 II, A7 III, A7R II, A7R III — Sony Exmor sensors, strong consistency from ISO 800 upwards
- Nikon Z5, Z6, D750, D610 — rebranded Sony sensors, identical behavior
- Canon EOS RP, R, R8 — Canon has closed the gap only from the recent generation, the older 5D Mark III and 6D have not
Megapixels: 24 is the sweet spot, beyond that it becomes a burden
A 24 MP full frame sensor has a pixel pitch of approximately 5.9 microns. Moving up to 42 or 61 MP reduces this to 4.5 or 3.8 microns. Smaller pixels gather less light individually and exhibit read noise sooner.
Furthermore, without an equatorial tracker, Earth's rotation limits exposure times to 20–25 seconds on wide-angle lenses before stars begin to trail. At 61 MP, these trails are 100% visible, whereas at 24 MP they are far less noticeable. For astro-landscape photography, 24 MP is the sweet spot: beyond that, you need a tracked setup, which is an entirely different world.
Used camera bodies under 700 euros that truly work
Three bodies in our catalog cover 90% of the needs of those starting to photograph the night sky with full frame. We have tested all three at the bench dozens of times, and all three behave differently under the stars. Let's look at them one by one with today's actual warehouse prices.
Sony A7 Mark II: the entry-level full frame that changes the game
The Sony A7 Mark II at 550-600 euros is the most rational option for those starting with the Milky Way. The 24-megapixel sensor is ISO-invariant from approximately ISO 640 upwards, meaning you can underexpose by one stop and recover in post without visible noise penalty. For landscape astrophotography, this is exactly what is needed: it protects the highlights of the light trail and leaves you with margin on the galaxy.
In-body image stabilization is useless here (you're shooting long exposures on a tripod), but the magnesium alloy body with partial sealing is essential: on two nights out of three in the mountains, you'll encounter heavy humidity. The real drawback is the NP-FW50 battery life: in winter at 3°C, you'll barely get 200 shutter counts. Always pack two spare batteries in your inner pocket, close to the body.
Canon EOS RP: lightweight full frame for those who want to take it to the mountains
The Canon EOS RP at 600 euros weighs 485 grams with battery, over 100 grams less than the A7 II. It may seem like little, but on the wall of a mountain hut after four hours of hiking, it counts. 26-megapixel full-frame sensor, articulating screen (extremely convenient for framing with the camera pointed upwards), Canon interface that users coming from EOS DSLRs find familiar from the very first shutter count.
There are two limitations. The read noise at 6400 ISO is slightly higher than that of the Sony A7 II: we are talking about half a stop in the sky's shadow areas, recoverable in Lightroom but still present. And the battery life, also poor here: the LP-E17 battery is small, so plan on having a spare. Otherwise, for those starting from scratch today with no previous lenses, the combination with an RF 16mm f/2.8 or an adapted Samyang 14mm f/2.8 is excellent.
Sony A7r: 36 megapixels for those who know how to make the most of them
The Sony A7r first generation at 700 euros makes sense only if you print large (over 70x100) or if you already know you will perform heavy crops on the galactic core. The 36 megapixels reveal pinpoint stars that the other two camera bodies do not resolve in the same way.
When it doesn't make sense: without an equatorial tracking head, the 36 MP amplify any star trail beyond 15-second exposures. The NPF rule here drastically cuts your exposure times compared to a 24 MP sensor. If you're starting from scratch and don't have a Star Adventurer on your list, the A7 Mark II remains the right choice.
APS-C: astrophotography is possible even with a tighter budget
Full frame helps, but it is not mandatory. With a used APS-C body under 600 euros, you can get dignified Milky Way shots, provided you accept two compromises: a usable ISO range that ends sooner and a 1.5x crop factor that forces you to start with shorter focal lengths to cover the same field of view. If a 24mm lens sees wide on full frame, the same 24mm becomes a 36mm equivalent on APS-C — too narrow for a panoramic Milky Way. You need to drop down to 14-16mm actual.
ISO 6400 noise on modern APS-C is manageable in post with AI denoise (DxO PureRAW, Lightroom Enhance), but you start from a noisier base compared to an A7 II. In practice: less headroom in the shadows and more attention to exposure during shooting.
Sony A6100: Modern BSI at an accessible price
The Sony A6100 in our catalog starts at 550 euros. Recent-generation 24 MP BSI sensor, very clean performance at 3200 ISO and 6400 ISO still workable with a bright wide-angle lens in front. The EVF viewfinder is basic, but for astrophotography you will still work in live view on the screen for focusing on stars. E-mount: you can find a used Samyang 12mm f/2.0 manual lens around 250 euros, a perfect pairing for panoramic Milky Way shots.
Fujifilm X-T2: for those who prefer ready-to-use JPEGs
The Fujifilm X-T2 at 550 euros is a choice for those who love Fuji color profiles and want to reduce post-production. The X-Trans III sensor has its own character, but there is one point to know: the non-Bayer pattern of X-Trans is notoriously more difficult to denoise in Lightroom, which generates "wormy" artifacts on fine star details. Process it in Capture One, in DxO PhotoLab, or use the direct JPEGs if that suits you. Top ergonomics, physical dials for ISO and shutter speeds that are very convenient for night shooting.
Nikon Z50 II and Z30: The Nikon mirrorless option
The Nikon Z50 Mark II at 780 euros is the latest of the trio: updated Nikon APS-C sensor, solid high-ISO noise handling. The Nikon Z30 at 450 euros is the lowest price to enter the Z system, but without a viewfinder and without a full hot shoe flash — perfect for astrophotography, you work on the rear screen. System limitation: the choice of native Z-mount APS-C wide-angle fast lenses is still limited, often a used Nikkor Z 14-30 f/4 (full frame, covers wide on DX too) is the better deal.
Under 600 euros for the camera body plus 250-400 for the lens, entry-level astrophotography becomes a realistic option without compromising on image quality.
The lens matters more than the body: how to choose the right wide-angle
If you have €1,000 to spend and must choose between a brand-new Sony A7 III with the 28-70mm f/3.5-5.6 kit or a used A7 II paired with a Samyang 14mm f/2.8, choose the latter without hesitation. For the Milky Way, the sensor matters, but the lens matters twice as much. A fast wide-angle lens doubles the light collected, and doubling the light means halving the required ISO, which means almost no noise.
Aperture: f/2.8 is the minimum, f/1.8 changes everything
The math is brutal and speaks for itself. At the same shutter speed and ISO, each stop of aperture doubles or halves the light hitting the sensor. In practical terms for a 20-second exposure of the sky:
- f/4: you need ISO 6400 to expose the Milky Way decently — noticeable noise even on full frame
- f/2.8: ISO 3200 is enough — acceptable cleanliness, this is the minimum threshold for serious astrophotography
- f/1.8: drop down to ISO 1600 — the file becomes malleable in post, recoverable shadows
The difference between a 24mm f/1.8 and a 24-70 f/4 is two full stops. Two stops are the difference between a photo you publish and one you delete.
Focal length: 14mm, 20mm or 24mm? It depends on what you want in the frame
Focal length determines two things: how much of the scene fits in the frame and how long you can keep the shutter open before stars turn into streaks. The 500 rule states: maximum exposure time in seconds = 500 / equivalent focal length. On modern high-resolution sensors, it is advisable to use the more conservative 300 rule.
| Focal Length | Max Exposure (300 Rule) | When to Use |
|---|---|---|
| 14mm | 21 seconds | Full arc of the Milky Way, wide landscape in the foreground |
| 20mm | 15 seconds | Ideal compromise: galactic core detail + context |
| 24mm | 12 seconds | Prominent core, compressed landscape, requires f/1.4-1.8 to recover light |
My personal preference is the 20mm: wide enough to capture the location, tight enough to show structure in the stars. If you are interested in fast prime lenses, I have explored the used models that are worth their price in the article on the top 10 used prime lenses under 500 euros.
Coma at the edges: the flaw that ruins 70% of fast lenses
Coma is the optical defect that turns stars at the edges of the frame into small gulls or white birds. At f/1.4 or f/2, you see it on 90% of zoom lenses and a good portion of budget primes. Before buying an optic for astrophotography, always search online for "[model] coma test" and check the 100% crops of the corners at full aperture.
The good news: stopping down by just one stop (f/2 instead of f/1.4, or f/2.8 instead of f/2) eliminates coma on 80% of lenses. You lose half a stop of light but gain pinpoint stars across the entire frame. It is almost always the right compromise.
Tripod and head: the investment often underestimated
A 60-euro tripod ruins all the work done on the body and the lens. A 25-second exposure at 14mm on a full-frame sensor reveals micro-vibrations that, at 24 megapixels, turn into ovalized stars, visible blurring at 100%, and shots to be discarded. Anyone who spends 1,000 euros on the body and lens and then mounts everything on an unstable tripod is sabotaging themselves.
Actual vs. declared load capacity: the 1.5x multiplier
Manufacturers specify reach under static laboratory conditions: tripod legs fully retracted, perfectly vertical load, no wind. In the field at night, reality is different. The center column is often extended, the camera body features a long wide-angle lens protruding forward, and there is almost always a light breeze, even in "calm" valleys.
The practical rule we use at the counter: divide the stated load capacity by 1.5 to get the real manageable load. A tripod rated for 5 kg handles 3 kg of static gear well in light wind. Under 90 euros, you find models claiming 8 kg that already vibrate with a 600-gram mirrorless body and a 24mm lens.
Aluminum or carbon: what matters in the field at night
Aluminum costs less and dampens vibrations well once it has settled. The problem is the weight: a serious aluminum tripod weighs 2.2-2.8 kg. When you climb to 1,500 meters to photograph the summer Milky Way, you feel that extra kilogram on your back after 40 minutes on the trail.
Carbon weighs 1.4–1.8 kg at equal stiffness, but costs twice as much. It dampens vibrations faster and handles cold better: aluminum becomes slippery and painful to handle bare-handed at -5°C. For those who go mountain shooting more than five times a year, carbon pays for itself.
Ball head or 3-way: which one do you need to point at the sky
For landscape astrophotography, the ball head wins without a doubt. You need to frame quickly by pointing upwards, realign when the Milky Way rotates 15 degrees per hour, and rebalance when you add a foreground. The three-way head is perfect in the studio, but slow under the sky.
A decent new ball head starts at €150. On the used market, a Markins Q3i or an Acratech GP-s can be found for under €200 and last for decades: they feature a single ground steel ball, with no plastic in the load-bearing points. For the other parts of the night kit — red light headlamp, intervalometer, batteries — the situation is different: we discussed this in essential photography accessories under €50.
A realistic budget for the base: 200 euros for a used carbon tripod and a decent ball head. Below that, you end up buying twice.
Essential accessories: what you really need beyond the camera
Beyond the camera body, lens, and tripod, there are four or five items that make the difference between a productive evening and a wasted night. None of these costs more than 30 euros, and all together they fit within a 100-euro budget. The rest of the astrophotography accessories catalog is largely marketing fluff.
Intervalometer: 15 euros that save you from micro-shake
When you press the shutter button, even with the camera on a solid tripod, you transmit a micro-vibration that lasts a fraction of a second. At 20 seconds of exposure on a 14mm, it goes smoothly, but on a 35mm or if the tripod is not perfectly stable, you see it. The stars in the corners become small blurred dashes instead of sharp points.
The built-in 2-second timer only partially solves the issue: you wait for the trigger but remain tied to the shoot-wait-shoot sequence. A generic wired intervalometer costing 15-20 euros (compatible with your remote port: N3 for Canon, MC-DC2 for entry-level Nikon, multi-port for Sony) allows you to do three things:
- Shutter release without touching the camera, zero vibration
- Bulb mode beyond the native 30 seconds for star trails or nebulae
- Automatic sequences for timelapses of the rising Milky Way
Wireless remotes cost twice as much, and in the cold, button batteries die within an hour. The cable never runs out of power.
Spare batteries: you need at least 2, preferably 3
At 4 degrees on Mount Conero in March, a Sony NP-FW50 battery that gives 350 shutter counts at home only yields 80 in the field before entering protection mode. The same applies to Canon LP-E17 or Fujifilm NP-W126S batteries. Lithium chemistry below 5 degrees loses between 40 and 60 percent of its real capacity.
During a three-hour astro session involving tests, final shots, and a few startrail sequences, you will take between 100 and 200 long exposures. A single battery is never enough. Keep the spare in the inner pocket of your jacket, in contact with your body: when the first one dies, the second is still at temperature and will last twice as long.
Red light front panel and planning app
A Petzl Tikkina with a red filter costs 25 euros and solves two problems: you can see what you are doing on the camera body and you do not ruin your eyes' dark adaptation. It takes 20-30 minutes for the pupil to dilate completely and for you to start seeing the Milky Way with the naked eye; a flash of white light resets the process in half a second.
On your phone, three apps cover 90 percent of the planning: PhotoPills (10 euros, one-time purchase) to calculate the azimuth and altitude of the galactic center hour by hour, Stellarium Mobile to identify constellations in real time, and Sky Guide if you are on an iPhone and want a cleaner interface. All of them have a red mode that does not ruin your night vision.
Three complete configurations under €1,500
Three setups I would assemble today at the counter with the catalog open. Real budgets, products we physically have in the store, designed for those who want to start photographing the Milky Way without making a mistake on their first purchase.
Entry-level setup 800 euros: Sony A6100 + Samyang 12mm f/2
This is the minimum configuration that actually works. Modern APS-C, clean sensor up to ISO 6400, and a bright manual wide-angle lens that costs a fraction of an autofocus equivalent.
- Camera body: Sony A6100 at 550-600 euros. 24 MP APS-C sensor, ISO 6400 usable in raw, upward tilting screen.
- Lens: Used Samyang 12mm f/2 NCS CS at 180-220 euros. 18mm equivalent on APS-C, full f/2 aperture, controlled coma at the edges.
- Tripod: Quality used model around 70-90 euros, minimum load capacity of 4 kg.
Total 800-900 euros. The limit is the crop factor: the Milky Way appears narrower compared to a full frame, and beyond 25 seconds of exposure, the stars start to streak. To get started and find out if astrophotography is for you, this is the correct entry point.
Sweet spot setup at €1,200: Sony A7 II + Samyang 14mm f/2.8 + Sirui tripod
This is the setup I recommend at the counter to 8 out of 10 customers who come in asking about landscape astrophotography. True full frame, bright wide-angle lens, serious tripod. Unbeatable result-to-cost ratio.
- Camera body: Sony A7 Mark II at 550-600 euros. 24 MP full frame sensor, in-body stabilization, ISO 6400 with manageable cinematic grain.
- Lens: Samyang 14mm f/2.8 manual at 280-320 euros. A classic choice for the Milky Way, wide coverage, f/2.8 gathers enough light for 20 seconds at ISO 3200.
- Tripod: Sirui T-2204X with ball head, used 220-260 euros. Carbon, 8 kg load capacity, rigid in the wind.
Total 1,150–1,250 euros. This is the range where RAW file quality allows you to push Lightroom without shadows collapsing into banding. It’s a setup that lasts for years.
Top setup 1,500 euros: Canon EOS RP + Samyang 14mm RF + Manfrotto 055 tripod
For those who want headroom in Lightroom and heavy crops. The latest Canon sensor, the RF mirrorless system with modern autofocus for daytime use, and a tripod that gets you home even in a north wind.
- Camera body: Canon EOS RP at 600 euros. Full frame 26 MP, native RF mount, dual pixel autofocus useful for daytime shooting.
- Lens: Samyang RF 14mm f/2.8 AF used, 450-500 euros. Autofocus on RF, excellent coma control, weather-sealed construction.
- Tripod: Manfrotto 055 aluminum with 410 micrometric head, used, 350-400 euros. Massive, stable, it will outlast your camera.
Total 1,400–1,500 euros. Above this figure, you won't gain meaningful quality for Milky Way photography: you're just adding weight and autofocus for other uses.
Mistakes we see at the counter from those starting with astro
In ten years of in-store consultations, the mistakes we see beginners make in astrophotography are always the same three. They are not sophisticated technical errors: they are budget allocation choices driven by brand marketing and YouTube reviews. The result is that the customer returns after two months, disappointed, with Milky Way photos full of noise and motion blur, convinced that "a better camera is needed." Almost never is that the case.
Buying the most expensive body and the kit lens
It's the classic scenario. A customer walks in with €2,000 in hand and leaves with a new Sony A7 IV and the 28-70 f/3.5-5.6 included in the kit. They head to the Apennines, aim at the galactic center, and shoot at 28mm f/3.5 ISO 6400 for 20 seconds. The Milky Way comes out washed out and noisy. The same shot taken with a €250 A6000 and a €200 Samyang 12mm f/2 gathers more than twice the light. The sensor collects photons based on aperture, not the price of the camera body. An f/2 versus an f/3.5 is a difference of over two stops: that means four times the light for the same exposure time. No camera body upgrade can recover that gap.
Underestimating the total weight of the gear
The truly dark spots in Italy are few and almost always require a hike. Seven or eight kilometers on foot on Monte Catria or the Sibillini Mountains to get far from light pollution. Those who start with a 9 kg backpack — full frame body, two lenses, a 3 kg aluminum tripod, batteries, thermos — return after an hour and a half. A functional astro setup must stay under 5 kg total, tripod included. That means a single fast wide-angle lens, a compact carbon tripod, and lightweight spare batteries. If you are training for astrophotography in the gym, something is not adding up.
Skip the tripod and grab a 70-300 zoom
This is particularly common among those who already own a telephoto lens at home and think, "I'll give it a try for the stars too." A 70-300 f/4.5-5.6 without tracking is unusable for astrophotography: the field of view is too narrow for the Milky Way, the aperture is too small, and at 300mm, Earth's rotation causes trailing after just two seconds of exposure. The 500 rule at 300mm yields 1.6 seconds before trailing occurs. The same budget spent on a serious tripod delivers measurable results from the very first outing. The same logic applies to focal length selection in general: as we explain in the article 50mm or 85mm for portraits: which lens do you really need?, each focal length has a specific use, and an optic designed for another purpose rarely compensates.
What we check at our lab before selling an astro camera
A camera that performs perfectly in daylight can betray you on the first night under the stars. Defective pixels invisible at ISO 400 become fixed red dots at ISO 6400 with long exposures. That is why, before listing a body we know will be used for astrophotography, we perform specific checks that go beyond the standard inspection.
Hot pixel test: the 30-second shutter count that makes the difference
In the lab, we take a 30-second dark frame at ISO 6400 with the cap mounted on the mount. The result should not be perfectly black: it must be nearly black, with uniform background noise. Defective pixels appear as red, green, or white dots always in the same position. A few scattered hot pixels are normal on any sensor with some years of use. However, concentrated clusters of hot pixels, vertical lines, or amp glow halos in the corners result in immediate rejection.
For bodies that pass the test, we record the number of hot pixels detected in the certificate and indicate whether the camera already has pixel mapping active. On Sony and Nikon, remapping can be done from the menu in 30 seconds; on Canon, official service is required. This is information we want to share with the customer before purchase.
We also check other specifics for night use:
- Shutter count: repeated long exposures heat up the shutter curtains; we verify that the timing remains accurate even after 20 consecutive 25-second shots.
- Seals and mount: night humidity is the real enemy; we check that the rubber seals around the SD card and battery slots are intact.
- Articulating screen: the hinges must be firm, as night shooting often requires awkward positions with the camera held low.
- Live view and magnification: manual focus on stars depends on a 100% sharp screen; we report any banding or lag.
Certified shutter count and 2-year warranty
Every camera body we sell includes the actual shutter count extracted via software from the sensor, not the figure declared by the previous owner. For astrophotography, this data carries double the weight: a camera with 80,000 shutter counts from weddings has endured far more than one with 80,000 shutter counts from landscape photography, yet the mechanical wear on the shutter is identical.
The 2-year warranty also covers defects that only emerge during night use. If, after three months of Milky Way sessions, you notice that the sensor has developed anomalous hot pixels or that the shutter is missing beats at long exposures, the camera body goes back to the lab and we fix it or replace it. No arguments and no requests for astro-club receipts. In the used photography market, this is a warranty that few offer.
Frequently Asked Questions
Can I do astrophotography with a used APS-C camera, or is full frame strictly required?
You can do very well with an APS-C. A Sony A6100 at 550 euros with a Samyang 12mm f/2 produces clean Milky Way images at 3200 ISO. The full frame collects 60% more light at the same aperture, but if the budget is 800 euros total, the advantage is nullified compared to an APS-C with a brighter lens.
How important are megapixels for astrophotography?
Little. Below 24 MP you lose crop flexibility, while above 30 MP you gain detail only if you have equatorial tracking. For static Milky Way landscape photography, 24 MP is the sweet spot between detail, noise, and file size manageable in post-production.
Is it worth buying new or used to get started with astrophotography?
Used, without a doubt. A 2014 Sony A7 II at 580 euros produces shutter counts that are practically indistinguishable from a new A7 IV costing 2,500 euros for night landscape use. The 1,900 euro difference is better invested in a fast lens, a serious tripod, and spare batteries.
Which used fast wide-angle lens do you recommend to get started?
The Samyang 14mm f/2.8 is available used for 250-320 euros for any mount. Coma is controlled, distortion is manageable in post, and the aperture is sufficient for the Milky Way. For APS-C, the Samyang 12mm f/2 is the equivalent at 180-220 euros. They are manual, but for astrophotography, the focus is fixed at infinity.
Is a cheap 60-euro tripod good enough for astrophotography?
No, and I say it clearly. A 60-euro tripod flexes at the first gust of wind, the legs do not lock stably, and the head slips under the weight of the camera body plus lens. Result: micro-shake on 20-25 second exposures. Reliable tripods for astrophotography do not exist under 150 euros. Aim for used Sirui, Benro, or Manfrotto models from us between 180 and 250 euros.
Do used mirrorless cameras work in the cold for winter mountain trips?
They work, but with caveats: the battery loses 40-50% of its autonomy below freezing. A Sony A7 II NP-FW50 that lasts 350 shutter counts at 20°C only achieves 150 at -5°C. Always keep 2-3 spare batteries warm in the inner pocket of your jacket. LCDs can become slow, as can autofocus: manual focus at infinity is better.
Do I need to modify the camera with an astro filter to photograph nebulae?
Only if you want to photograph H-alpha nebulae (Orion region, North America, Veil). For landscape Milky Way photography, the stock camera is perfectly fine. The astro modification (removal of the IR-cut filter) costs an extra 200-300 euros and makes the camera unusable for normal photography without white balance correction. For a start, leave it alone.
Want to get started with astrophotography? Let's choose the right setup together
If you have doubts about a purchase or need advice for your specific case, contact us. We offer free advice because we are photographers first, and because a customer who makes a bad purchase won't come back to photography.
Three ways to get in touch:
- Contact form — response within 24 business hours
- WhatsApp at 342 362 3454 (messages only)
- Phone: 071 291 6347 (Mon-Fri 9-13/15-18, Sat 9-13)
And if you want to see what we have in stock right away, explore the used equipment available today: every camera is certified, comes with a 2-year warranty, and is shipped within 24-48 hours.
Article written by Matteo for the ReflexMania Team. Last updated: May 2026. Prices and availability refer to the time of publication.