
In short
- A 64 GB UHS-I V30 SD card from a reputable brand (SanDisk, Lexar, Kingston) costs 12-18 euros and is sufficient for 90% of beginners: paying 40 euros for V60 without shooting 4K is a waste.
- A second original or Patona Premium battery costs 25-40 euros and doubles battery life: the difference between coming home with photos and coming home frustrated.
- A tripod under 50 euros, such as the Manfrotto Compact Action or the aluminum Neewer, supports a mirrorless camera with a kit lens up to 1.2 kg without issues.
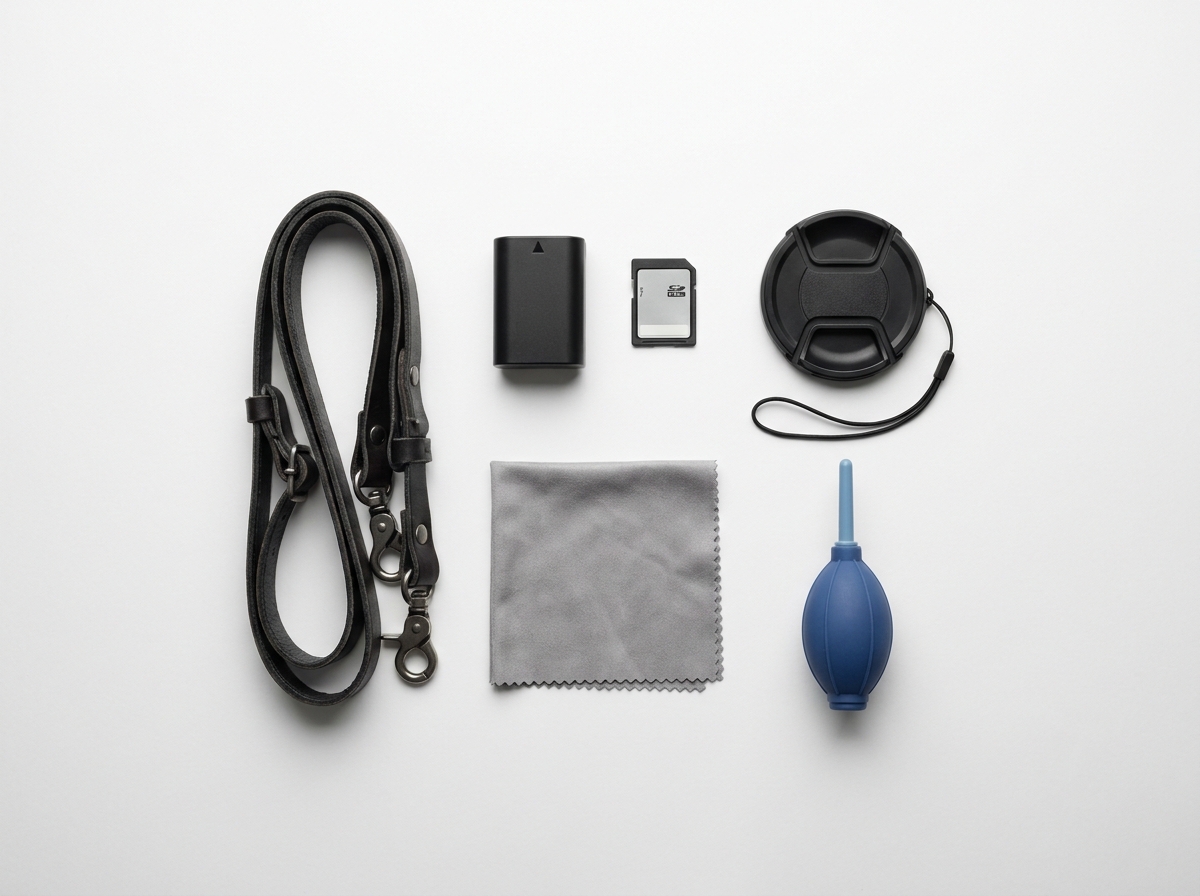
- A strap, lens hood, microfiber cloth, and blower are the four accessories under 15 euros that most beginners forget and later regret.
When I sell a used mirrorless camera to a beginner, nine times out of ten the question after the purchase is the same: "and what do I need now?". The honest answer is that you need few things, all under 50 euros, and that 90% of the accessories sold as essential on generalist sites are superfluous or duplicates of something you already have.
In this article, I list the 10 accessories I actually see used daily by the photographers who walk into our shop, from the beginner who just picked up a Canon EOS R100 to the photographer returning after ten years with an old DSLR. No padded lists, no affiliations with products I wouldn't use myself. Just what you need, why you need it, and what it really costs in 2026.
1. SD memory card: the first thing to buy
The memory card is the only accessory you cannot skip: without it, the camera is just a paperweight. Yet it is also the accessory where beginners most often make mistakes, buying cards that are too small, too slow, or too large under the assumption that "bigger is better". After ten years behind the counter, I can tell you that 90% of those who walk in with an entry-level mirrorless — a Canon EOS R100 or a Nikon Z30 — do not need the 80-euro card that Amazon sold them in the bundle.
Capacity: 64 GB is the sweet spot
Thirty-two GB is not enough today. A 24-megapixel mirrorless camera produces RAW files of 25–30 MB each: 32 GB equals roughly 1,000 RAW shutter counts, which can be exhausted in a single wedding day or two weekends on vacation. One hundred twenty-eight GB presents the opposite problem: if the card gets corrupted, you lose everything at once, and for a beginner shooting JPEGs mixed with a few RAW files, it will never fill up.
64 GB is the right balance: 2,000-2,500 RAW files, 4-5 hours of 4K 30p, and a reasonable cost. Two 64 GB cards are better than one 128 GB card: rotate them, and if one fails, you still have the other.
Speed: what V30, U3, and UHS-I mean
The nomenclature on the spec sheets seems designed to confuse you. In practice, you need three numbers:
- UHS-I vs UHS-II: the bus standard. UHS-I reaches a theoretical 104 MB/s, while UHS-II reaches 312 MB/s. The R100 and the Z30 support UHS-I only: buying UHS-II is a waste of money, as the camera body cannot utilize it.
- V30 / V60 / V90: guaranteed minimum write speed for video (30, 60, 90 MB/s).
- U3: equivalent to V30, guarantees sustained 30 MB/s.
A V30 is sufficient for RAW burst shooting and 4K 30p, which is all these two cameras can do. A V60 is only necessary if you move to 4K 60p or long, high-bitrate video: you will never reach those specs with an entry-level card. Paying €40 for a V60 when a €15 card would have been enough is the most common waste I see.
Brands to prefer and brands to avoid
SanDisk Extreme, Lexar Professional, Kingston Canvas Go Plus, Samsung Pro Plus: €12–18 for 64 GB V30, genuine warranty, and an extremely low failure rate. I keep all four in the lab for checking incoming used camera bodies.
What to avoid: cards from unknown brands on Asian marketplaces for 5 euros for 256 GB. The rate of fake cards (firmware that declares double the actual capacity) is extremely high, and when you realize it, you are back from your holidays with half your photos corrupted. If you have never heard of the manufacturer, do not buy it. To get oriented on the camera body on which you will mount the card, also read our guide on how to choose your first used mirrorless.
2. Spare battery: the difference between a day of shutter counts and a day of regrets
A dead battery is the dumbest way to ruin a day of shooting. It always happens at the worst possible moment: sunset at the harbor, a friend's wedding, a mountain trip two hours from home. A mirrorless sensor consumes more power than a DSLR, and a Sony ZV-E10 with the NP-FW50 battery barely exceeds 400 real-world shutter counts. The Canon EOS RP with the LP-E17 battery claims 250 CIPA shutter counts with the LCD (210 with the EVF), and in real-world use with the EVF, it easily drops below 200.
That is why the second battery is the first accessory we recommend after the SD card. It costs less than a dinner out and literally doubles the battery life.
Original, compatible, or Patona Premium?
The battery market has three tiers, and understanding them avoids €30 mistakes.
- Original (60-80 euro): Full real capacity, best long-term durability, but outside the budget of those buying a budget accessory. Makes sense if the camera is your sole source of income.
- Generic compatible (10-15 euro): Uncertified Chinese brands. They claim 1200 mAh, but in real-world tests they deliver 700-800. After 6 months, some stop charging. Not recommended.
- Patona Premium (25-40 euro): The honest sweet spot. Real capacity close to the original, Japanese or Korean cells, 2-year warranty. Works on 95% of Sony, Canon, Nikon, Fujifilm camera bodies. It's the one we hand to the customer when the original is out of stock or too expensive.
Pay attention to a detail: from the EOS R8 onwards, Canon has introduced an authentication chip that displays a warning with compatible lenses. The camera still takes certified shutter counts, but if that message bothers you, the original remains the only choice. On the EOS RP and older mirrorless models, this issue does not exist.
How many batteries do you really need
One spare battery is enough for 95% of real-world uses. A day of street photography, a weekend getaway, a wedding: 800-1000 total shutter counts fit comfortably in two batteries.
The two additional batteries are only useful in three specific scenarios:
- Continuous video recording (4K recording drains a battery in 60-90 minutes).
- Multi-day trips without access to power outlets (trekking, camping).
- Long events such as weddings where you cannot stop to recharge.
The situation changes slightly with Micro 4/3 sensors: the Olympus PEN E-PL9 with the BLS-50 delivers approximately 350 real shutter counts, in line with entry-level full-frame mirrorless cameras. Again, one spare battery is sufficient. Buying three is for those who confuse "being prepared" with "being anxious".
3. Budget tripod: what you can really get for under 50 euros
The tripod is the accessory where marketing does the most damage. On Amazon, you'll find "professional carbon" models for 35 euros that weigh 800 grams and wobble if you breathe near them. Under 50 euros, honest tripods do exist, but you need to know what to look for and what compromises to accept.
The three models we regularly sell and recommend at the counter in this price range are the Manfrotto Compact Action (around 45 euros), the 162 cm aluminum Neewer (28-35 euros), and the K&F Concept TM2324 (40-48 euros). All three do their job well with an entry-level mirrorless. The Manfrotto wins on finishes and ergonomic lever head, the Neewer on height-to-price ratio, and the K&F on versatility (converts to a monopod).
Reach and height: the two numbers that matter
When you look at a tripod's specifications, two values truly matter: the declared load capacity and the maximum extended height. Everything else is just context.
An APS-C mirrorless with a kit lens weighs between 500 and 700 grams. A Nikon Z30 with the 16-50mm stays under 600 grams. An Olympus PEN E-PL9 with the 14-42mm pancake is even lighter, around 480 grams. A tripod with a declared load capacity of 1.5 kg supports it effortlessly, leaving room for a future upgrade to a lightweight 70-300mm.
When it comes to height, do not go below 130 cm extended without the center column raised. Below that threshold, you will find yourself hunched over looking through the viewfinder, and after ten minutes, your back will hate you. Raising the center column to its maximum does not help: it introduces vibrations and should only be used as a last resort.
- Useful load capacity: minimum 1.5 kg declared (margin over the actual weight of the kit).
- Extended height without center column: 130 cm or more.
- Tripod weight: 1.2-1.8 kg is the sweet spot; below that it's unstable, above that you won't carry it.
- Head: ball or lever, provided it has a quick-release plate mount.
When a tripod under €50 is NOT enough
I have to be honest here. There are situations where a cheap tripod is useless, and insisting on using it means wasting the 45 euros you spent.
If you mount a 300mm or longer telephoto lens, the leverage on the head causes the thin aluminum legs to flex. Photos come out blurry even when using the self-timer. The same applies to strong winds above 20 km/h: a 1.3 kg tripod acts like a sail, and without a central hook for counterweights, there is no solution.
For serious night photography with exposures of 30 seconds or longer, where every micro-vibration is visible, the step up to a €150-200 tripod (Manfrotto Befree Advanced, Sirui T-024X) is justified. We delve deeper into this topic in our article on gear and techniques for night photography, where we explain why, in that context, the tripod weighs more than the camera body.
Even for long exposures on the beach or in the mountains, you need sturdier legs and clamps that don't get stuck with sand or ice. For everything else — daytime landscapes, portraits with a self-timer, occasional video, panoramas — the 45 euros well spent are more than enough.
4. Decent strap: throw away the one included
The strap included in the box with your mirrorless or DSLR is almost always two things: uncomfortable after an hour around your neck and branded with the manufacturer's logo printed in huge letters. Replacing it is one of the most affordable and underrated upgrades: for 25-30 euros, you completely change how you carry the camera on your body for hours.
The standard rigid neoprene strap slips, digs into the neck, and distributes the weight of a 600-gram camera body with a lens mounted poorly. A padded nylon or synthetic leather strap with anti-slip features costs little and performs far better.
Classic strap vs sling vs harness
The right type depends on how you use the camera. Three main categories, each with a specific use case:
- Classic neck strap (15-25 euros): Neewer in synthetic leather or waxed cotton. Suitable for static use, studio portraits, and events where the camera stays mostly stationary. Long walk = guaranteed neck pain.
- Single-shoulder sling (25-35 euros): the Peak Design Slide Lite at around 50 euros is the benchmark, but affordable BlackRapid options or Neewer copies under 30 euros work well. The camera hangs at your side and lifts to eye level in a second. Ideal for street and travel.
- Dual harness (35-50 euros): two cameras simultaneously, one on each side. Essential for those working weddings or sports events with two different camera bodies. Useless for a beginner with a single camera.
For serious hiking, consider a backpack shoulder strap clip (such as the Peak Design Capture, which costs over 50 euros and is therefore out of scope here): a strap swinging across your chest while climbing is annoying.
Why avoid visible branding
A strap with NIKON or CANON in yellow letters on black communicates one thing to onlookers: there is an expensive camera underneath. On the Milan metro, at the Naples station, or on crowded regional trains, it is advertising you do not need.
Aftermarket camera straps are almost all neutral: black, brown, grey, without logos. They cost €15-25 on Amazon and remove a small risk signal. It’s not paranoia, it’s common sense: most photographic equipment thefts happen because someone saw something of value.
One detail from the counter: customers bringing in used camera bodies for resale almost always have the original strap still rolled up in the box, never used. It’s an indirect confirmation that serious photographers replace it immediately.
5. Entry-level bag or backpack: how much do you really need to spend
The marketing of camera bags lives on a polite lie: that you need special materials to protect a 600 euro camera. In reality, a Lowepro Tahoe BP 150 at 35 euros, a Vanguard Vesta Aspire 41 at 40 euros, or a padded Amazon Basics bag at 25 euros do exactly the same job: velcro dividers, a back with minimal padding, and a zipper that holds. Under 50 euros, don't expect genuine rain-resistant fabrics or ergonomic straps: expect a soft case that protects the camera body and lens from normal impacts.
At the counter, I see customers coming in with used Sony A6100 for 600 euros or Canon EOS R100 for 400 euros, having spent 80 euros on a "professional" bag to justify the purchase. It's not necessary. You need an honest 25-40 euro case, and you can put the remaining 40 euros toward a second battery or a serious SD card.
Sling, backpack, or messenger: choosing based on use
The choice depends on how you shoot, not on what others do:
- Single-shoulder sling bag: 2-3 hour city outings, one camera body plus one lens. Extract and take certified shutter count shots without removing the backpack. Honest models: Lowepro Slingshot Edge 150 at 30 euros, Amazon Basics sling at 22 euros.
- Two-shoulder backpack: travel, trekking, full days with camera body + 2 lenses + water + jacket. Under 50 euros, aim for 15-20 liter volumes. Lowepro Tahoe BP 150 at 35 euros is the honest classic.
- Messenger bag (crossbody with flap): city work, quick access, less "photographer" look. Vanguard Veo City at 45 euros or Tenba Skyline at 40 euros.
A dedicated photography backpack signals "expensive camera" in a crowd. In busy tourist areas, this is a detail that matters. A discreet shoulder strap or an anonymous messenger bag reduces attention.
Modular inserts: the smart alternative under €20
The advice we give most often to customers walking into our shop is this: don't buy a dedicated camera bag, buy a modular padded insert and put it in the backpack you already have. Tenba BYOB 7 or 9 cost 15-18 euros, while generic copies on Amazon cost 10-12 euros. They are padded cubes with velcro dividers that turn any trekking, school, or office backpack into a camera backpack.
Concrete benefits: you pay a third of the price, it serves two purposes (remove it when you need the backpack for other things), and no one guesses what you are carrying. When you move to a second camera body or a longer lens, you only change the insert. For a beginner with an A6100 and a kit lens, a 15 euro insert in your everyday backpack covers 90% of your outings.
6. UV filter or protection: is it really necessary?
The UV filter is the most typical sale for a shopkeeper when you bring home a new lens. "Put it on to protect the front element, it costs little." In most cases, it is advice that serves the shop's margin more than your photography.
Digital sensors, unlike film, are already insensitive to UV. The filter does not correct anything in terms of color or contrast. Only the protective function remains, and even there, it is worth doing the math: a 5-euro filter in front of a 400-euro lens degrades optical performance more than it protects it. Add flare in backlight, internal reflections at night, and a slight loss of sharpness at the edges.
When it really makes sense to mount one:
- Sea and beach: Saltwater attacks anti-reflective coatings. Cleaning a filter is trivial; cleaning a front lens element with damaged coating is not.
- Windy mountains or desert: Fine sand and abrasive dust permanently scratch the front glass.
- Sports reportage or construction sites: Environments where a stone, a shard, or a splash can hit the lens.
For normal use — walking, city travel, portraits — the lens hood we discuss in section 8 already does 90% of the protective work without degrading the image.
UV vs polarizer vs ND
The three filters are often confused, but they do very different things:
| Filter | Purpose | When to buy it |
|---|---|---|
| UV | Physical protection of the front lens element | Only in harsh environments (sea, sand) |
| Polarizer (CPL) | Removes reflections from water and glass, saturates skies and foliage | Landscape, travel, lake or sea photography |
| ND (neutral density) | Reduces light for long exposures in full daylight | Long exposures of waterfalls, creative motion blur, video with wide apertures outdoors |
If you only spend 30 euros on a filter, get a decent polarizer. It visibly changes the rendering of a sky or reflections on water, something a UV filter never does.
Honest brands under 30 euros
When it comes to filters, the rule is simple: if it costs 5 euros, it’s worse than having none. Untreated glass, nonexistent coating, and a plastic ring that binds in the thread.
Brands that, for 20–30 euros and standard diameters (49, 52, 58, 67 mm), deliver an honest product:
- Hoya — HMC or UX series: multi-coated glass, thin ring, made in Japan. A historical benchmark.
- K&F Concept — excellent value for money, multi-coated, widespread distribution on Amazon.
- Marumi — less well-known in Italy but offers optics on par with Hoya, at similar prices.
Steer clear of "3 filters + case + hood + cap" kits for 15 euros total: the glass is the component you're actually paying for, and it's not there in those bundles.
7. Cleaning kit: blower, cloth, swab
A clean camera performs better than an expensive dirty one. Yet, a complete cleaning kit costs less than 30 euros, and almost no beginner buys one before their first trip to the beach or the mountains. The result: photos full of black spots, lenses with fingerprints that reduce contrast, and sensors that after six months look like a starry sky.
The essentials are three items under 30 euros in total:
- Blower Giottos Rocket Air (medium or large): 8-12 euros. Blows clean air without propellant. The red rocket-shaped model has been an industry standard for twenty years.
- Photographic microfiber cloths: 5-8 euros per pack of 3-5 pieces. Brands such as K&F Concept, Hama, Zeiss. Hand washable with lukewarm water, no fabric softener.
- Sensor swabs (correct format: APS-C or full frame): 12-18 euros per pack of 12 pieces. VSGO, K&F Concept, Photographic Solutions. Disposable, sterile, pre-moistened or with dedicated liquid.
What not to use: blowing with your mouth (saliva and moisture on the lens), cotton t-shirts (scratch anti-reflective coatings), industrial compressed air (contains oils and propellants that leave residues), denatured alcohol from the supermarket (impurities and incorrect water content).
Optical cleaning vs sensor cleaning
These are two different jobs. You clean the lens, always, and it needs to be done often. Correct sequence: use a blower to remove dust and debris, then a microfiber cloth with a circular motion starting from the center. Never start with the cloth: dragging a grain of sand across a lens means scratching it permanently.
The sensor is a different story. It is exposed to every lens change, attracts dust due to electrostatic charge, and any scratch means hundreds of euros in repair costs. If you are a beginner, avoid DIY swabs for the first few months. Use a blower with the camera body upside down (so the dust falls downward) and that is enough. For wet cleaning with a swab, wait until you have a steady hand and dedicated front lighting.
What we do in the ReflexMania lab
Every used camera we sell goes through our workshop before hitting the display. Professional sensor cleaning, shutter check, certified shutter count verification, and AF tests on all points. A Sony A7 Mark II at 550 euros or a Sony A7r at 700 euros arrive at your door already serviced, so you don't have to worry about it for the first year.
If you have your own camera and the sensor is in poor condition, professional cleaning costs 30-40 euros and takes half a day. It is often worth it compared to damaging a sensor by using a swab incorrectly.
8. Lens Hood: The Free Accessory Almost Nobody Uses
The lens hood is included in the box for almost all lenses above 200 euros, yet 70% of the beginners I see at the counter leave it in the drawer. That's a mistake. The lens hood does two concrete jobs, and neither is aesthetic: it cuts flare and protects the front element from impacts.
Flare is that milky haze that appears when a strong light source — sun, streetlight, window — hits the lens at an oblique angle. Without a lens hood, contrast drops and colors turn washed out. With the lens hood mounted, even when shooting into the light in the mid-afternoon, the image remains clean.
The second advantage is mechanical. If the camera falls forward or you bump it against an edge, the lens hood absorbs the impact before the glass. I have seen dozens of lenses return to the workshop with a cracked lens hood and an intact front element: it did exactly its job. Repair cost: zero, because it was already there.
Practical rules for actually using it:
- Always mount it, even indoors. It doesn't slow you down and doesn't add any noticeable weight.
- Invert it for transport: it slides onto the lens in reverse and takes up the same space as the barrel.
- Use the right one for that focal length. A 24mm lens hood on a 50mm doesn't cut enough light; an 85mm one on a 24mm vignettes the corners.
- Petal for zooms and wide-angle primes, cylindrical for telephoto lenses. The shape isn't aesthetic, it's calculated based on the field of view.
Original vs JJC/Haoge compatible
If you've lost the original lens hood or it wasn't included, you have a choice to make. Canon, Nikon, Sony, and Fujifilm sell replacements for €30–60. Same plastic, same bayonet mount, engraved brand logo. JJC and Haoge produce compatible clones that cost €8–15 on Amazon and perform identically: same internal geometry, same locking click, same anti-reflective black flocking.
The only honest difference: the plastic of the compatible version is slightly less refined to the touch. Functionally, they are indistinguishable. On a €1,500 lens, the aesthetics of the original may make sense, but on an entry-level 50mm f/1.8, paying €50 for a lens hood when the entire lens costs €130 is out of scale.
Look for the exact model of your lens hood (e.g., "EW-65B" for the Canon RF 28mm, "LH-XF35-2" for the Fuji XF 35mm f/2): the mount is specific, not universal. When one comes up in our used lots, we inspect it, clean the internal felt with a dry cloth, and include it with the lens at no extra charge.
9. External SD Card Reader: The Detail That Speeds Up Your Workflow
Transferring 32 GB of photos via cable from the camera to the computer takes an average of 8-10 minutes. With an external UHS-II SD reader, you cut that down to 3 minutes. It may not seem like much, but if you shoot regularly, multiply that by 50 sessions a year and you save hours of time in front of the PC.
The reason is simple: the camera's USB port is almost always limited. A Sony A6400 connected via cable transfers at 40-60 MB/s in the best cases. A Canon EOS RP reaches 50-70 MB/s. A decent UHS-II reader, paired with a compatible card, gets you over 200 MB/s in real-world speeds. The difference is noticeable right away.
The models we recommend at the counter are three, all under 25 euros:
- UGREEN UHS-II USB-C (15-18 euro): the absolute best buy. Compact, aluminum casing, handles heat well during long transfers.
- Anker PowerExpand 2-in-1 (20-25 euro): dual SD + microSD slots, sturdier build, Anker warranty.
- Kingston MobileLite Plus (18-22 euro): established brand, stable drivers on Windows and Mac, great for those who want no surprises.
Pay attention to one detail: a UHS-II reader paired with a UHS-I card does not multiply the speed. The bottleneck becomes the card. If you have a SanDisk Extreme UHS-I V30, the UHS-II reader will give you a maximum of 90-100 MB/s. It is still twice the speed of a cable, but do not expect the 250 MB/s from marketing.
USB-A or USB-C: it depends on your computer
The rule here is simple: check the ports you have. Laptops from the last 4-5 years almost exclusively feature USB-C, while older desktops still have USB-A. The convenient solution is to get a dual-port reader: the UGREEN we sell alongside our used camera bodies has both connectors on the same body, so you just pull out the one you need.
A separate note on Android smartphones with USB-C: most recent models can read SD cards directly via an external reader. This is useful for those who want to check photos on their phone while traveling or transfer them immediately to Lightroom Mobile. On iPhones with a USB-C port (15 and later), it works the same way; on Lightning models, the original Apple adapter is required.
A detail we always remind customers picking up a used camera: connecting the camera via cable to download photos also drains the battery. With an external reader, the camera stays off, the battery remains charged, and the workflow is cleaner.
10. Remote or app for self-timer: 10 euros to stop running
The camera's 10-second self-timer is a 1985 solution. You run, pose, force a smile, and discover you have your eyes closed. A Chinese wireless remote costs 8-12 euros on Amazon and changes the way you shoot group portraits, self-portraits, and long exposures.
The problem becomes serious when you mount the camera on a tripod for long exposures. Pressing the shutter button introduces micro-vibration even with a stabilized Nikon Z5. The 2-second timer helps, but for exposures over 30 seconds, you need bulb mode, and bulb without a remote is impractical.
Canon/Nikon/Sony Apps: Pros and Cons
Almost all manufacturers offer a free official app: Canon Camera Connect, Nikon SnapBridge, Sony Imaging Edge, Panasonic LUMIX Sync. They connect via WiFi or Bluetooth and allow you to shoot from your phone with a live preview. On paper, it’s perfect. In practice, less so.
- They drain the camera battery: the WiFi on a DSLR/mirrorless consumes a lot. A Panasonic GH5 with WiFi active loses an additional 20-25% of battery life compared to normal shooting.
- 1-2 second delay: there is a non-negligible time between tapping the app and the actual shutter release. It's fine for group portraits, but not for catching an expression.
- They disconnect: SnapBridge is notorious. Lost connection, app to reopen, pairing to redo. In the cold, phones shut down and you're left without a shot.
- Smartphone battery: if you're in the mountains at -5°C, your phone will last 30 minutes.
IR Remote/Cable: The Solution That Never Breaks
A generic €10 wireless remote from Amazon (Neewer, JJC, Pixel) does one thing and does it well. No WiFi, no pairing, no app to update. Open the box, insert the CR2032 button battery, point it at the camera's IR sensor, and press. It works from a distance of 5 meters.
For long exposure and astrophotography, a remote release is mandatory, not optional. Most budget models feature a button with a sliding lock: you press it, lock it, leave the camera open for 5 minutes without touching it, then unlock it. In our article on night photography, we explain in detail why this specific feature makes the difference between a sharp star trail and a blurry one.
Check compatibility only before buying: not all entry-level mirrorless cameras have a built-in IR sensor (Canon, for example, removed the receiver from recent R series 50 models). In that case, you need the wired version via micro-USB port or proprietary connector; it costs the same and lasts the same.
Frequently asked questions
Is it worth buying a 40-euro 'all-inclusive' accessory kit on Amazon?
No. Those kits generally contain a slow SD card from an unknown brand, compatible batteries that last half of what is claimed, tripods that wobble at the first breeze, and poor-quality optical filters. Spending 60-80 euros on individual high-quality pieces will give you a result five times better.
How long should a compatible battery really last?
A compatible Patona Premium battery or equivalent branded battery should guarantee 80-90% of the original capacity. Generic €10 batteries often declare inflated values and in reality reach only 50-60% of the original shutter count. On a camera like the Sony ZV-E10, this means 200 shutter counts instead of 440.
Does a UV filter really protect the lens from a drop?
To some extent. A UV filter can absorb a light impact, but in a serious drop the lens will still break, and the filter fragments may worsen the damage. The real protection is the mounted lens hood. A UV filter only makes sense in harsh environments: windy beaches with sand, dusty mountains, or shooting in heavy rain.
Can I use my smartphone as a remote instead of buying one?
Yes, the official Canon, Nikon, Sony, and Panasonic apps work. There are three limitations: the WiFi connection between the camera and the smartphone drains both batteries faster, there is a 1-2 second delay between the touch and the shutter count, and in winter, touching the screen with gloves becomes uncomfortable. A 10 euro IR remote control solves everything.
Are used SD cards reliable?
Not recommended. SD cards have limited write cycles, and there is no way to know how much they have been used. On a used card for 5 euros, you save only a few euros compared to a new branded one for 15. A card that corrupts during a wedding or a trip costs much more than the difference.
Is a €30 tripod worth it, or should I jump straight to a €150 one?
It depends on usage. If you take two photos a month on vacation with a lightweight mirrorless camera, a 30-40 euro tripod like the Neewer aluminum model is sufficient. However, if you regularly shoot landscape, night, or astrophotography, stepping up to a 150-200 euro Manfrotto Befree or Sirui will reward you with stability and durability.
Can I clean the sensor of my camera myself?
Technically, yes, with a dedicated swab and specific solution (the kit costs 15-20 euros). Practically, if you are a beginner, the risk of scratching the sensor or leaving streaks is high. In our lab, sensor cleaning costs 30-40 euros and guarantees a clean result with no risk. For lenses, however, you can do everything at home with a blower and a microfiber cloth.
Do you have a new camera and don't know where to start?
If you have any doubts about a purchase or need advice for your specific case, contact us. We offer free advice because we are photographers first and sellers second, and because a customer who makes a bad purchase does not return to photography.
Three ways to get in touch:
- Contact form — response within 24 business hours
- WhatsApp at 342 362 3454 (messages only)
- Phone: 071 291 6347 (Mon-Fri 9-13/15-18, Sat 9-13)
And if you want to see what we have in stock right away, explore the used gear available today: every camera body is certified, comes with a 2-year warranty, and ships within 24-48 hours.
Article written by Matteo for the ReflexMania Team. Last updated: May 2026. Prices and availability refer to the time of publication.