
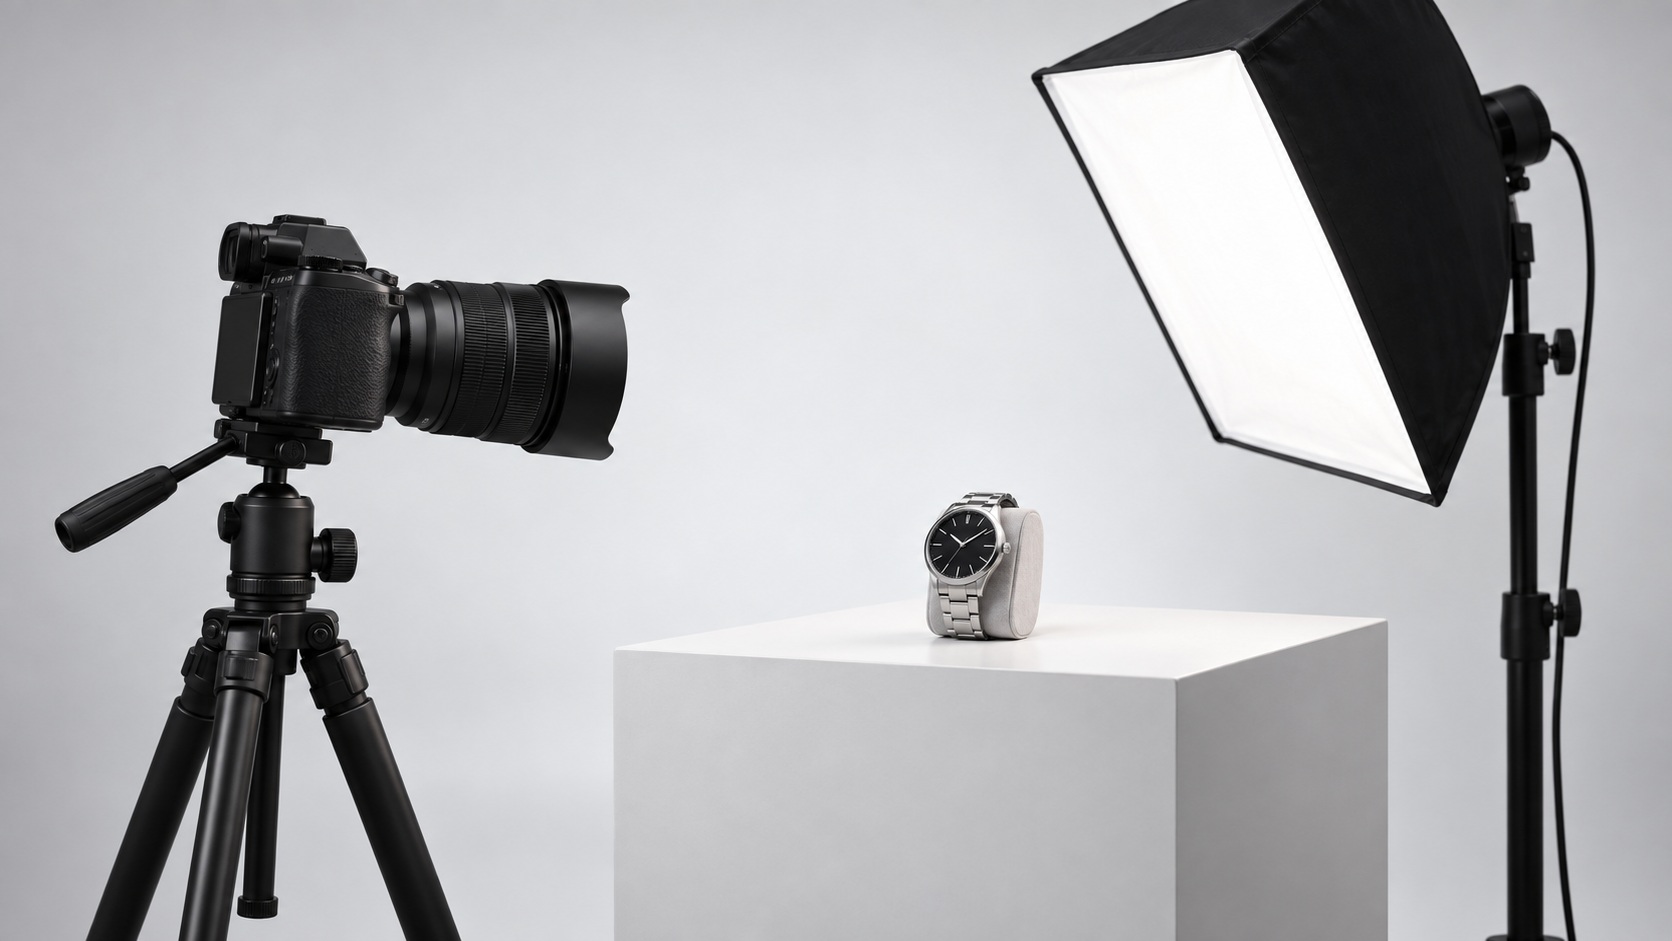
In short
- For product photography, the camera body matters less than in any other genre: you shoot at ISO 100, on a tripod, with controlled light. A Sony A6000 for 360 euros produces files printable at 50x70 cm.
- The lens is where it makes sense to spend: a used 1:1 macro (Canon EF 100mm f/2.8, Sigma 105mm) costs 250-400 euros and resolves details that no 18-55 kit reaches.
- Live view with focus peaking and tethered shooting are worth more than 10 extra megapixels: they verify focus at 100% before the shutter count, not after.
- Realistic budget for a complete used setup: 900-1,300 euros for the body, macro, solid tripod, and two continuous lights. The studio flash is optional, not mandatory.
In our lab, we photograph every camera that comes in: body, back, mount, display, sensor. We take thousands of shutter counts a year, all on a neutral background, all with the same equipment. That setup cost less than a new full-frame camera body and has never been a bottleneck.
This article lays out what you actually need to photograph stationary objects — e-commerce products, still life, packaging, jewelry — and what is just marketing. It covers the spending priority order, specific models we have in stock today, and the three or four things you must check on used gear before paying.
Why the camera body is the least critical item in a product photo
A watch resting on a white background doesn't run away. It doesn't change expression, doesn't move, and doesn't force you to chase it. This triviality completely changes the list of things worth paying for. In still life, you take certified shutter counts on a tripod, at ISO 100, with constant light and all the time you need: the easiest conditions in which a camera body can work.
The practical result is that most of the price of a modern camera body goes into features that will remain off on the studio table. A Sony A6000 at 360 euros — we have three in stock — produces 24 MP files at ISO 100 that are indistinguishable in print from those of a 2,000-euro body under the same conditions.
The specs you'll never use on a still life table
- Eye-tracking autofocus: the subject is stationary and you focus manually by zooming in on the live view.
- 20 fps burst: you will take one shutter count, review it, and take another. The burst is noise here.
- ISO 51,200: you decide the light. If it's lacking, you lengthen the exposure time, you don't raise the sensitivity.
- IBIS stabilization: turn it off when using a tripod.
A note on the claimed "5 stops of stabilization." That figure measures how much you can extend the shutter speed while holding the camera in your hands. When you set the shutter speed yourself and the camera is screwed onto a plate, the gain is zero.
The three features that actually change your day
- Focus peaking and 100% live view magnification: verify the focal plane before taking the shutter count, not after downloading the cards.
- USB tethering to the computer: judge sharpness and reflections on a large screen, where defects are truly visible.
- Self-timer or remote control: a two-second delay eliminates the micro-vibration of the hand on the button, which is visible at f/11 and half a second.
On the shutter: the electronic shutter eliminates curtain vibration, but with some cheap LED lights it produces horizontal flicker bands. If you see them, switch to the mechanical shutter with a slow sync. You also need a decent dynamic range and 14-bit RAW to recover specular highlights on metals without increasing noise in the shadows.
Megapixels: When 24 Is Enough and When You Need 36 or More
24 MP cover a 50x70 cm print at just over 200 dpi and any e-commerce use, where the final image is under 2,000 pixels on the side. The Canon EOS RP, which we keep between 520 and 600 euros, fits exactly there with the advantage of the full frame sensor and the articulated screen.
Going above 24 MP serves only one purpose: cropping. The 36 MP of the Sony A7r at 700 euros make sense if you photograph jewelry, electronic components, or if you need to derive three different crops from the same shutter count for your catalog. If you publish on Shopify, they are just heavier files.
Used camera bodies that make sense for still life, by price range
In our workshop, we handle cameras ranging from €300 to €3,000. On a still life setup with continuous lighting and a tripod, the difference in the final file is much smaller than the price suggests. Below are the camera bodies we keep in stock that make sense for this use, divided by price range, along with the real-world limitations of each.
Under €500: APS-C cameras that truly deliver
The Sony A6000 at 360 euros features a 24-megapixel APS-C sensor and a live view with focus peaking that, when stopped down to f/11, tells you exactly which portion of the subject is in focus before you take the shot. It is the camera body that most people who photograph products for e-commerce start with. The limitation is not the sensor: it is the tethering, which on the A6000 is partial and depends on Sony software, and a screen that tilts but does not rotate.
The Canon EOS R100 costs between 375 and 400 euros and gives you access to the native RF mount, meaning modern Canon lenses without adapters. Its drawback in still life is concrete and daily: the screen is fixed. When you point the camera body downwards onto a surface — which is almost always the case in this genre — you end up contorting yourself to read the monitor. It is not an image quality flaw, it is a posture flaw.
Full frame entry: when the full format adds something
Here, the advantage is not noise, as even an APS-C sensor is clean at ISO 100. The advantage lies in the bokeh quality at the same framing and the much wider selection of macro lenses designed for the full-frame format.
The Canon EOS RP starts at 520 euros; we have nine units in stock, with an average price of 584 euros. It features 26 megapixels and, most importantly, a fully articulating screen: flip it to the side for comfortable viewing, even when the camera is placed face-down on the table. For still life photography, it is the best compromise available on our bench.
The Sony A7 at 400 euros gives you 24 megapixels full frame for the price of a new APS-C. The compromise lies entirely in the 2013 camera body: clunky menus, slow USB port, and less reliable tethering with current software. It's worth it if you work from the card and don't need a cable.
High resolution: only if you really need it
| Model | Price | Resolution | For whom |
|---|---|---|---|
| Sony A7r | 700 euros | 36 MP | Parts catalogs, packaging with fine print |
| Sony A7r Mark II | 800 euros | 42 MP | Jewelry, extreme crops, large format printing |
Honest warning: high resolution amplifies every mistake. A focus shift of two millimeters and a shutter vibration you don't see on 24 megapixels become 100% evident on 42. If you buy an A7r Mark II, you must also factor in a serious tripod and a more rigorous technique — the same discipline required for landscape photography with long exposures.
If you already have an APS-C from the last eight years, don't change it. The jump from A6000 to EOS RP gives you about one stop more bokeh at the same framing. The same 550 euros spent on a 1:1 macro lens and two continuous lights will change your results much more.
The optics: where it pays to invest
A used 1:1 macro lens costs €250–400 and delivers a level of detail that no kit zoom can match, even in the best lighting conditions. It is the only component of your setup where the price jump translates into a visible improvement in the final file. If you have €600 to split between the camera body and the lens, put €400 into the lens.
True macro vs "macro" on the box
On the technical specifications, look for just one item: the maximum magnification ratio. 1:1 means that a 24 mm object is projected at 24 mm on the sensor, filling it completely. An 18-55 lens boasting the "macro" label typically reaches 1:3, often worse: the object occupies a third of the frame, and to fill it you have to crop, throwing away two-thirds of the pixels.
| Lens | Ratio | Used Price Range | Note |
|---|---|---|---|
| Tamron 90mm f/2.8 | 1:1 | 230-300 € | The affordable classic, excellent detail rendering |
| Canon EF 100mm f/2.8 (non L) | 1:1 | 270-350 € | Robust, adaptable to RF without losses |
| Sigma 105mm f/2.8 | 1:1 | 250-330 € | Great value for money, heavy |
| Nikon AF-S 105mm VR | 1:1 | 350-450 € | VR is not needed here: shutter count on a tripod |
Note that they are all f/2.8, which is irrelevant. In still life, you stop down to f/8-f/11 to achieve depth of field on the subject: at f/11, an f/2.8 macro and an f/3.5 macro produce the exact same file. Paying 150 euros more for a stop of brightness you will never use is money wasted.
Which focal length for which subject
- 50-60mm — medium to large products, shoes, bags, tight setups where you have no space behind the camera.
- 90-105mm — small objects, jewelry, watches. The greater working distance prevents you from casting the camera's shadow on the subject or hitting the set while focusing.
- 150-180mm — when you need to isolate without getting close, or compress the perspective on rows of aligned products.
On APS-C, multiply by 1.5: a 60mm lens frames like a 90mm on full frame. However, the reproduction ratio remains as stated and does not increase.
Budget-friendly alternatives: extension tubes and manual lenses
A set of extension tubes costing 30-70 euros turns a standard 50mm lens into a macro setup. The limitations are real: you lose 1-2 stops of light, lose focus at infinity, and lack any optical correction designed for short distances. On a tripod with controlled lighting, it remains an honest solution to get started.
Vintage manual lenses adapted to mirrorless bodies work well here, as you focus manually anyway. However, cheap 20-euro screw-on extension tubes do not: they introduce chromatic aberration at the edges and ruin the macro capabilities you were looking for.
Diffraction: why you shouldn't close beyond f/16
Closing the aperture increases depth of field but, beyond a certain threshold, light diffracted by the blades degrades sharpness across the entire frame. On APS-C, the drop-off starts to become visible at f/11, while on full frame it occurs around f/16. When depth of field is insufficient, the correct solution is not to stop down further: it is focus stacking, i.e., 5-15 shutter count shots with progressive focus merged in post. On a stationary subject with a solid tripod, this is the standard procedure, not an advanced trick.
Tripod, head, and stability: the part nobody wants to pay for
In still life, a tripod works under worse conditions than in landscape photography. The center column is often flipped or set horizontally, the center of gravity moves outside the triangle formed by the legs, and the camera points downward, staying there for hours. A 60-euro tripod can hold a compact camera vertically, but it cannot support a DSLR with a 600-gram macro lens hanging from a side arm.
The practical rule I use at the counter: declared load capacity at least triple the actual weight. A full-frame camera body plus a 100mm macro lens weighs about 1.4 kg, so you need a tripod rated for 4-5 kg. This is not excessive caution: the load capacities declared by manufacturers apply under ideal conditions, with the column lowered and legs at the first section.
What to look for in a used tripod
Aluminum legs are perfectly fine. In the studio, weight is not an issue; in fact, it works in favor of stability, and carbon costs twice as much for an advantage that is not needed here. For used gear, there are five checks to perform, all doable in a minute:
- Play in the sections: extend everything, lock it, and try to twist the last section. If it moves, the locks are worn out.
- Load retention: mount a real camera body and leave it for five minutes with the column fully extended. Legs that drop on their own should be discarded.
- Original plate present: a generic Arca plate costs 15 euros, while a proprietary plate for a discontinued model may be unobtainable.
- 3/8" thread not stripped: screw and unscrew the head twice; it must go in straight without forcing.
- Hook and feet: the hook under the column is for the counterweight, and the hardened rubber feet will slip on tiles.
For this use case, a ball head is the worst choice. A 3-way head allows you to adjust one axis at a time: you can level the horizon without losing the tilt you have already set. With a ball head, you unlock everything at once and have to start over from scratch every time, which, in a catalog of forty pieces, becomes an hour lost.
Side arm and top-down shooting (flat lay)
The zenith shot problem is trivial and unsolvable without the right gear: your legs end up in the frame. Three solutions, in order of cost:
| Solution | Indicative Cost | Limitation |
|---|---|---|
| Reversible center column | Included in many tripods | Working under the tripod, inverted screen is uncomfortable |
| Side arm | 40-90 euros used | Shifts the center of gravity off-axis |
| Tripod with flag arm | 150-250 euros used | Bulky, requires dedicated space |
A note on the side arm that is worth the price of the gear: without a counterweight, the tripod tips over. It does not "vibrate"; it tips over, with the camera body falling from a meter. A 3 kg sandbag hung on the column hook, on the side opposite the arm, solves the problem. It costs 10 euros and saves you 1,500.
Vibrations: the three sources that ruin your f/11 shots
At f/11 and ISO 100 with continuous light, you easily end up between 1/15 and 1/2 of a second. This is the worst window for vibrations, where micro-movement is not visible on the screen but destroys detail at 100%.
- Mechanical shutter: the bounce of the first curtain is measurable at long exposures. Enable the electronic front-curtain shutter (EFCS) or the fully electronic shutter, with the only caveat being flicker from cheap LEDs.
- Finger on the button: use a 2-second self-timer or a wired remote. A compatible used remote costs 15-25 euros.
- The floor: we noticed this in-store while measuring. People walking past the setup on a wooden floor or an old attic floor introduce micro-vibrations into long exposures. If you shoot at home on parquet, stop moving while the shutter is open.
A detail that confuses many: on a tripod, IBIS enabled can worsen sharpness. The system looks for movement that isn't there and introduces its own drift, especially between 1/10 and 1 second. Recent camera bodies detect the tripod and turn off automatically, those from 2014-2018 often don't. Turn it off manually and that's it. The same reasoning applies outside the studio: in night photography the stability of the support matters more than any stabilizer.
Lighting: Continuous or Flash, and What You Really Need to Start
On a static subject, on a tripod, at ISO 100, flash offers no decisive advantage. You can keep the shutter open for two seconds with continuous light and get the same file. For this reason, in product photography, LED continuous light is the correct starting point for the vast majority of beginners: you see the result before you take the shot, you don't have to learn to read the histograms of a flash, and the same gear serves you for video as well.
Studio flash becomes necessary in three specific cases: large reflective surfaces that require very wide panels and therefore high power, high-volume productions where 300 shutter count per day is needed with short turnaround times, and situations where you want to precisely control the light-shadow ratio across multiple light sources. Outside of these cases, spending 700 euros on single-head units and triggers is money that would have yielded a better return on a macro lens.
Two lights and a panel: the minimal setup that works
The schema that solves 90% of products is straightforward and needs to be set up only once:
- Key light at 45 degrees to the subject, slightly elevated, using a softbox or diffuser umbrella. The larger the diffuser is relative to the product, the softer the light-to-shadow transition.
- White reflector panel on the opposite side, at 30–40 cm. A €3 cardstock sheet does the same job as a €40 folding reflector.
- Background light, optional, to separate the product from the backdrop or clean up the whites.
In the used market, two bi-color LED panels with stands and softboxes can be found for between 150 and 250 euros per pair. Do not look at the declared wattage: they are almost always equivalent watts, a marketing figure. Look at the CRI and the build quality of the stand.
Reflective surfaces: the real problem in still life
Metal, glass, and glossy plastic do not emit light: they reflect it. This is the angle family, i.e., the set of directions from which the surface can send light back to the lens. On a steel watch, that family is only a few degrees wide: if the room's ceiling is in that direction, you see the room's ceiling in the reflection.
The solution is geometric, not technological: very wide diffusion above and to the sides (a diffusion tent or a simple stretched white sheet), black cards at the edges to draw dark lines that give volume, and white cards to fill. No camera body and no lens can improve a wrong reflection. This is the only part of product photography where the time spent moving panels beats any upgrade.
Backdrops, still life table and the light box temptation
A 70x100 card bent between the table and a stand costs 5 euros and produces a background without a horizon line that is better than many light boxes under 100 euros. Those boxes diffuse from all sides simultaneously: they flatten the subject, remove contact shadows, and the product appears to float. A light box makes sense in only one case: high-volume e-commerce where 400 product listings must have exactly the same look, and repeatability matters more than the character of the image.
White balance and color rendering
The product's color is the only thing a customer can verify by comparing photos with the actual item. Budget LEDs with a CRI below 90 misrepresent reds, terracotta, and beige: a burgundy sweater appears as dull brown, and the return arrives on time. Look for a declared CRI of 95+ or TLCI of 90+, and be wary of sellers who disclose nothing.
Operational rule: first shutter count of every session with an 18% grey card or a color checker in the frame. It costs you five seconds and gives you a certain white point in post-processing, even months later when you no longer remember the lighting conditions you worked under.
Tethering and workflow: the difference between shooting and producing
Thirty products to photograph in a single day are not tackled by looking at the back of the camera. Tethering — the camera connected via USB to the computer, with every shutter count appearing on screen in two or three seconds — is what separates an amateur session from a repeatable production. It is not a matter of convenience: it is the only way to judge focus on a 24-inch monitor instead of a 3-inch LCD.
The three concrete advantages, in the order you notice them:
- Focus at 100% before moving on. On a detail like a zipper or an engraved logo, the camera's display tells you it's in focus. The monitor tells you it isn't.
- Overlay with a reference shot. Capture One and Lightroom allow you to place an image as a semi-transparent overlay: replicate the framing of the previous product to the millimeter. For a catalog of 200 items that must all have the same scale, this alone is worth the cost of the software.
- Remote control of parameters. Change aperture and shutter speed from the computer without touching the camera. On a tripod with a reversed column, every finger resting on the body is a micro-shift to correct.
The manufacturer's free software is enough to get started: Canon EOS Utility and Sony Imaging Edge Remote handle capture and remote control at no cost. What they don't do well is overlay and session management. If your volume grows, Capture One remains the standard.
What to check on a used camera body if you work in tethering
Here, the differences between the camera bodies in our catalog are real and worth checking before you buy.
| Body | Port | Practical note |
|---|---|---|
| Sony A7 — 400 euros | micro USB 2.0 | Tethering works but RAW transfer is slow. Continuous USB power is unreliable: a dummy battery is recommended. |
| Canon EOS RP — from 520 euros | USB-C | Power and charging via USB PD while shooting. EOS Utility is solid and free. |
| Sony A7 Mark III — 750 euros | USB-C + micro USB | Dual ports, stable tethering, and reliable continuous power. The most convenient of the three in production. |
The door latch and contacts are a weak point in used equipment: torn rubber hinges, oxidized pins, and a loose connector after years of cable strain. A body that disconnects every twenty shutter counts is unusable for tethering, and the defect is not visible during a quick bench test. At our shop, the data connection test is part of the inspection, not just the power-on check.
Focus stacking: when it's needed and how to set it up
At f/11 on a 1:1 macro at a distance of 25 cm, the depth of field is only a few millimeters. If the subject is a watch or a ring shot at three-quarters, it will not be covered. The solution is focus stacking: 10-30 shutter count with the focal plane shifted progressively, combined in Photoshop, Helicon Focus, or Zerene.
Two ways to shift focus. The built-in focus bracketing in the body — present on the Canon EOS RP, absent on the Sony A7 — sets the number of shutter count and the increment range, handling everything automatically. Alternatively, a manual micrometric rail under the camera, which costs 40-80 euros used and works with any camera body.
The hidden cost: stacking significantly increases post-production time, and on glossy surfaces it generates artifacts that require manual correction. Use it only when truly necessary, not as a default setting.
Buying used for still life: what we check in our lab
Product photography is the genre that highlights flaws you would never see elsewhere. A reportage photographer with three specks of dust on the sensor might not notice them for months: they shoot at f/2.8 against complex backgrounds. Someone photographing a watch on a white background at f/11 sees every single one and retouches them by hand on every image. That is why our review checklist changes weight when we know the camera body will be used on a still life table.
Dust and spots on the sensor: here they are all visible
The test takes half a minute and you can do it yourself at home. Point the camera at a light, uniform surface — a white wall, an A3 sheet of paper, an overcast sky — set f/16, defocus completely, and take a shot. Then open the file and push the contrast curve to the maximum. What appears is not noise: it is deposits on the filter in front of the sensor.
The distinction we make in the lab is between what is removed and what remains:
- Dry dust: remove with a blower or electrostatic brush, takes two minutes. Covers 90% of cases.
- Oil spots, often from shutter lubricant on heavily used camera bodies: wet cleaning with swabs and dedicated solution. It can be removed, but must be redone if the cause persists.
- Scratches on the AA or IR filter: not cleanable. A scratch does not disappear and is always visible against a white background at f/11. A camera in this condition does not enter our certified shutter count inventory.
Certified shutter count: how much it really matters in this category
Shutter count is the first piece of data everyone asks for, and for still life it is almost always overestimated. A Canon EOS RP with 15,000 shutter count, which we currently have in stock between 520 and 600 euros, has used a minimal fraction of its shutter's estimated lifespan. But the real point is different: a tabletop setup takes 40-80 shutter count per session, not 800 like a day of sports photography. Even a refurbished body with 80,000 shutter count behind it, in these conditions, has years of work ahead of it.
What we check most carefully, however, is the shutter's reliability at low speeds (1/4, 1/2, 1 second — the shutter speeds you will actually use with continuous light), the integrity of the USB port because it handles tethering, and the hinges of the articulating screen, which on a camera pointed downwards work every day. Every camera body comes with a 2-year warranty.
The most common budget mistake we see at the counter
Someone comes in with €1,200 and wants to spend €1,000 on the camera body and €200 on everything else. The allocation we propose is the opposite:
| Item | Typical setup | Recommended allocation |
|---|---|---|
| Camera body | 1,000 € | 400 € (e.g., Canon EOS R100, available from us for 375-400 €) |
| Macro lens | 0 € | 350 € |
| Tripod and head | 120 € | 200 € |
| Lights | 80 € | 250 € |
The second set produces better photos than the first, they are not comparable. If you already have a camera body and are considering selling it to fund the lens, read how to sell used photographic equipment before selling it cheaply to the first person who comes along.
Three complete configurations, with real prices
Three setups we actually build, using the camera bodies we have in stock today and market prices for the rest. The figures for lenses and accessories are indicative of used items in excellent condition: they vary by 30-50 euros depending on what comes through the counter.
Around 900 euros: hobby e-commerce or small business
- Camera body: Sony A6000 at 360 euros, or Canon EOS R100 from 375 euros. The A6000 offers the advantage of the used E-mount lens park and a tilting screen; the R100 provides more immediate Canon files for white balance, but the fixed screen is a drawback for overhead shots.
- Lens: used 1:1 macro in native or adapted mount, 250-350 euros.
- Tripod: aluminum with reversible center column and 3-way head, 120-150 euros.
- Lights: two bi-color LED panels with softbox, 100-140 euros for the pair.
- Accessories: cardboard backdrop, two polystyrene reflector panels, remote shutter. Under 40 euros.
Approx. 1,300 euros: regular production
The step up lies in moving to full frame with the Canon EOS RP (€520-600, we have 9 units in stock) or the Sony A7 Mark III at €750. What you actually get: a more reliable articulating screen for high-angle shooting, more stable and mature tethering, and a battery that lasts a full session day without a swap. The rest of the budget goes toward a sturdier tripod with a side arm (€200-250) and a third light to separate the subject from the background.
Approx. €1,900: Professional catalog with extreme crops
Here, the camera body matters again, but for one reason only: resolution. The Sony A7r Mark II at 800 euros delivers 42 megapixels, providing enough headroom to crop a watch detail and print it full-page. The remaining budget covers a higher-end macro lens, a carbon fiber tripod with a micrometric head, and a studio flash with a large softbox for reflective surfaces.
What never changes across the three configurations: shoot at ISO 100, f/8-f/11, on a tripod, without touching the camera during the exposure. The quality of the background and the cleanliness of the product matter more than the difference between 24 and 42 megapixels. If you already have an APS-C, skip the first configuration: mount the macro and lights on the body you have.
Frequently asked questions
Do you need a full frame for product photography?
No. On a tripod, at ISO 100 and f/11, the advantage of the full-frame sensor is almost negligible: depth of field is actually shallower, making it less convenient. The 24 megapixels of a Sony A6000 at 360 euros cover a 50x70 cm print and any web use. Full frame makes sense if you already own full-frame lenses, if you need more than 30 megapixels for multiple crops, or if you also produce portraits and reportage with the same camera body.
Can I use the 18-55mm kit lens for product photography?
For objects 15 cm and larger, yes, and the performance at f/8 is decent. The limitation is the minimum focusing distance, approximately 25-30 cm, with a magnification ratio of around 1:3. This means that a ring or a screw fills one third of the frame in the best case. For small objects, a true macro lens or extension tubes are required.
LED continuous light or studio flash: which is better?
To start, continuous light. You see the result as you build it, not after the shutter count, and this greatly shortens the learning curve. Flash is suitable when you work with large reflective surfaces that require high power in diffusion, when you produce dozens of shutter counts per day, or when you have to work in an environment with uncontrollable ambient light. Be careful with LEDs under CRI 90: they get reds and light colors wrong, and product color is the first thing a client disputes.
How many shutter counts are too many on a used camera body intended for still life?
Far fewer than one might fear. A still life camera takes few shutter counts per session, always in a clean and dry environment, without temperature fluctuations. A camera body with 80,000 certified shutter counts, revised and with a regular shutter, is perfectly suitable. The real check to perform is on the sensor and the USB port, not on the counter.
Does focus stacking require a recent camera?
No. The built-in focus bracketing is convenient, but you achieve the same result by manually adjusting the focus between shutter counts or by moving the camera using a 40-80 euro micrometric rail. The merging happens in software, not in the camera. With a stationary subject, you have all the time you need.
Which used macro lens do you recommend as a first purchase?
A 90-105mm f/2.8 with a 1:1 magnification ratio. Used Canon EF 100mm f/2.8, Nikon AF-S 105mm VR, Sigma 105mm f/2.8, and Tamron 90mm lenses all range between 230 and 450 euros depending on version and condition. The greater working distance compared to a 50-60mm lens prevents the camera body from casting a shadow on the subject and leaves room to fit diffusers and reflectors between the lens and the product.
Is it worth buying a budget light box?
Rarely. Tents costing 40–60 euros produce flat, uniform light that flattens volumes and materials, and they are still limited in subject size. A 70x100 white cardstock curved into a seamless backdrop, two LED panels, and a reflector cost only slightly more and give you control. A light box only makes sense if you produce hundreds of product images that must all look identical.
Want to set up your still life station? Let's talk
If you have doubts about a purchase or need advice for your specific case, contact us. We offer free advice because we are photographers first, sellers second, and because a customer who makes a bad purchase won't come back to photography.
Three ways to get in touch:
- Contact form — response within 24 business hours
- WhatsApp at 342 362 3454 (messages only)
- Phone: 071 291 6347 (Mon-Fri 9-13/15-18, Sat 9-13)
If you want to see what we have in stock right away, explore the used cameras available today: every camera body is certified, comes with a 2-year warranty, and ships within 24-48 hours.
Article written by Matteo for the ReflexMania Team. Last updated: September 2026. Prices and availability refer to the time of publication.