
In short
- For interior real estate photography, the useful focal length range is between 16 and 24mm on full frame (10-16mm on APS-C): below 14mm equivalent, rooms appear larger than they actually are, and buyers will notice this on their first visit.
- Correcting converging verticals in post-production typically crops 15 to 25% of the frame: on a 24 MP sensor, this leaves 18-20 MP, which is sufficient for a real estate portal but insufficient for large-format printing.
- A tilt-shift lens such as the Samyang T-S 24mm f/3.5 costs between 400 and 500 euros: it makes sense for those who photograph facades every week, but not for those who shoot 3 apartments a month.
- A complete real estate kit with the Canon EOS R100 (from 340 euros on ReflexMania), Canon RF-S 10-18mm, and a tripod with a level costs around 700 euros. When using a tripod, in-body image stabilization is useless.
At least once a month, a real estate agent walks into the shop asking for the widest lens we have. They want a 10mm on APS-C, sometimes an 8mm, because a two-bedroom apartment needs to look like a three-bedroom one. Two months later, they come back: clients arrive at the viewing, find a 12-square-meter room where the photo promised 20, and leave after five minutes. The issue wasn't the camera body, but the focal length choice, and with it, the tripod and lighting.
We lay out what you actually need to photograph architecture and real estate with used gear: which wide-angle lenses to choose, when a tilt-shift lens is worth the investment, which camera body is sufficient, and which accessories make more of a difference than a new lens. We wrap up with the checks to perform before buying a used wide-angle or shift lens, and with three concrete kits, at real prices, ranging from the budget of an agent photographing their own properties to that of a professional working for architecture firms.
Architecture and real estate: two different jobs with common needs
A real estate photographer delivers 30 photos of a three-room apartment in a couple of hours. An architectural photographer might spend the same morning on three compositions of a facade. We put them in the same drawer because they photograph buildings, but the work is different. The equipment worth investing in changes as well.
| Real Estate | Architecture | |
|---|---|---|
| Subject | Interiors, room by room | Exteriors, volumes, construction details |
| Volume | 20-40 shots per apartment | Few carefully composed shots |
| Time | Tight, often multiple properties in the same day | Even half an hour for a single shot |
| Destination | Web portals like Immobiliare.it and Idealista, 1920-2500 px long side | Print, magazines, studio portfolio |
They share three common issues, and the rest of the article is built around them:
- Straight vertical lines: walls, door frames, and edges must remain parallel to the frame borders.
- Wide-angle: in a 3x4 meter room, you cannot step back, and neither can you in front of a building on a narrow street in the city center.
- Dynamic range: if you expose for the room, the window will blow out; if you expose for the window, the room will turn black.
Vertical lines: the flaw everyone notices
Converging verticals are the most recognizable sign of a rushed photo. Tilt the camera just a few degrees downward and the walls appear to lean toward the floor. A buyer scrolling through a listing may not know the technical term for the flaw, but they immediately sense that something is off.
The practical rule is to keep the sensor parallel to the wall: camera level, without tilting it forward or backward. In interiors, this works if you shoot between 1.2 and 1.5 meters from the ground. At eye level, around 1.7 meters, you are forced to tilt downward to include the floor. With facades, it is the opposite: from the sidewalk, you tilt upward, and the building appears to lean backward.
Image honesty: the limit real estate marketing ignores
Making rooms look bigger with the widest wide-angle is a shortcut that comes at a price: the agent loses an afternoon to a viewing that ends in five minutes, and next time they call another photographer.
The photo should make you want to visit the house, without deceiving the viewer. In architecture, the principle is the same: the image must reflect the proportions intended by the designer, not distort them for effect. Almost all of this is determined by the choice of focal length, and that is where the next section begins.
The right wide-angle: focal lengths, distortion, and the 16mm limit
On real estate portals, we more often see lenses that are too wide rather than too narrow.
Interiors: between 16 and 24mm equivalent, almost never below
On full frame, interior work is done between 16 and 24mm, which corresponds to 10-16mm on APS-C. In a 4 sqm bathroom, a 16mm lens is truly necessary, as there is no space to step back, and the sanitary fixtures, shower, and window must all fit within the same frame. In a 30 sqm living room, shooting from a corner, a 20-24mm lens is sufficient, and the proportions remain credible.
In residential interiors, the 12mm on full frame works against the user. However, the issue is not just the wide angle: there are two distinct types of distortion that are often confused.
- Barrel distortion: straight lines curve outward. It depends on the optical design and can be corrected with a single click by loading the lens profile.
- Edge perspective distortion: depends on the angle of view. A round table near the edge becomes oval, an armchair stretches, and a person widens. No profile can correct this: the only remedy is to keep important objects away from the edges.
Exterior and facades: less width, more distance
To photograph a facade, it is better to cross the street and use a 24-35mm lens rather than getting close with a 16mm. From a distance, verticals converge less, upper floors are not compressed, and the building's proportions remain true. Historic center alleys are the exception: if you have only three meters of space behind you, the 16mm remains the only option.
Zoom f/4 vs f/2.8: where not to spend
Here, shooting is done at f/8 on a tripod, often with one-second shutter speeds. An f/2.8 is needed for handheld shooting in low light or to separate the subject from the background, and neither of these applies to this work. At f/8, the Canon EF 16-35mm f/4L IS USM is sharper in the corners than the 16-35mm f/2.8L II. It also holds its own against the f/2.8L III, which costs about twice as much on the used market.
| Lens | Format | FF Equivalent | Used (indicative range) | Note |
|---|---|---|---|---|
| Canon RF-S 10-18mm f/4.5-6.3 IS STM | APS-C Canon RF | 16-29mm | 180-230 € | Lightweight, covers from bathroom to living room |
| Sony E 10-18mm f/4 OSS | APS-C Sony E | 15-27mm | 350-450 € | Constant aperture, the reference for APS-C Sony |
| Canon EF 16-35mm f/4L IS USM | Full frame EF | 16-35mm | 550-650 € | Excellent corners at f/8, works on RF with EF adapter |
| Nikon AF-S 16-35mm f/4G ED VR | Full frame F | 16-35mm | 450-550 € | Barrel distortion at 16mm, corrected by profile |
| Sony FE 16-35mm f/4 ZA OSS | Full frame E | 16-35mm | 500-650 € | Compact, covers interiors and facades |
Used tilt-shift lenses: when a shift lens is worth the investment
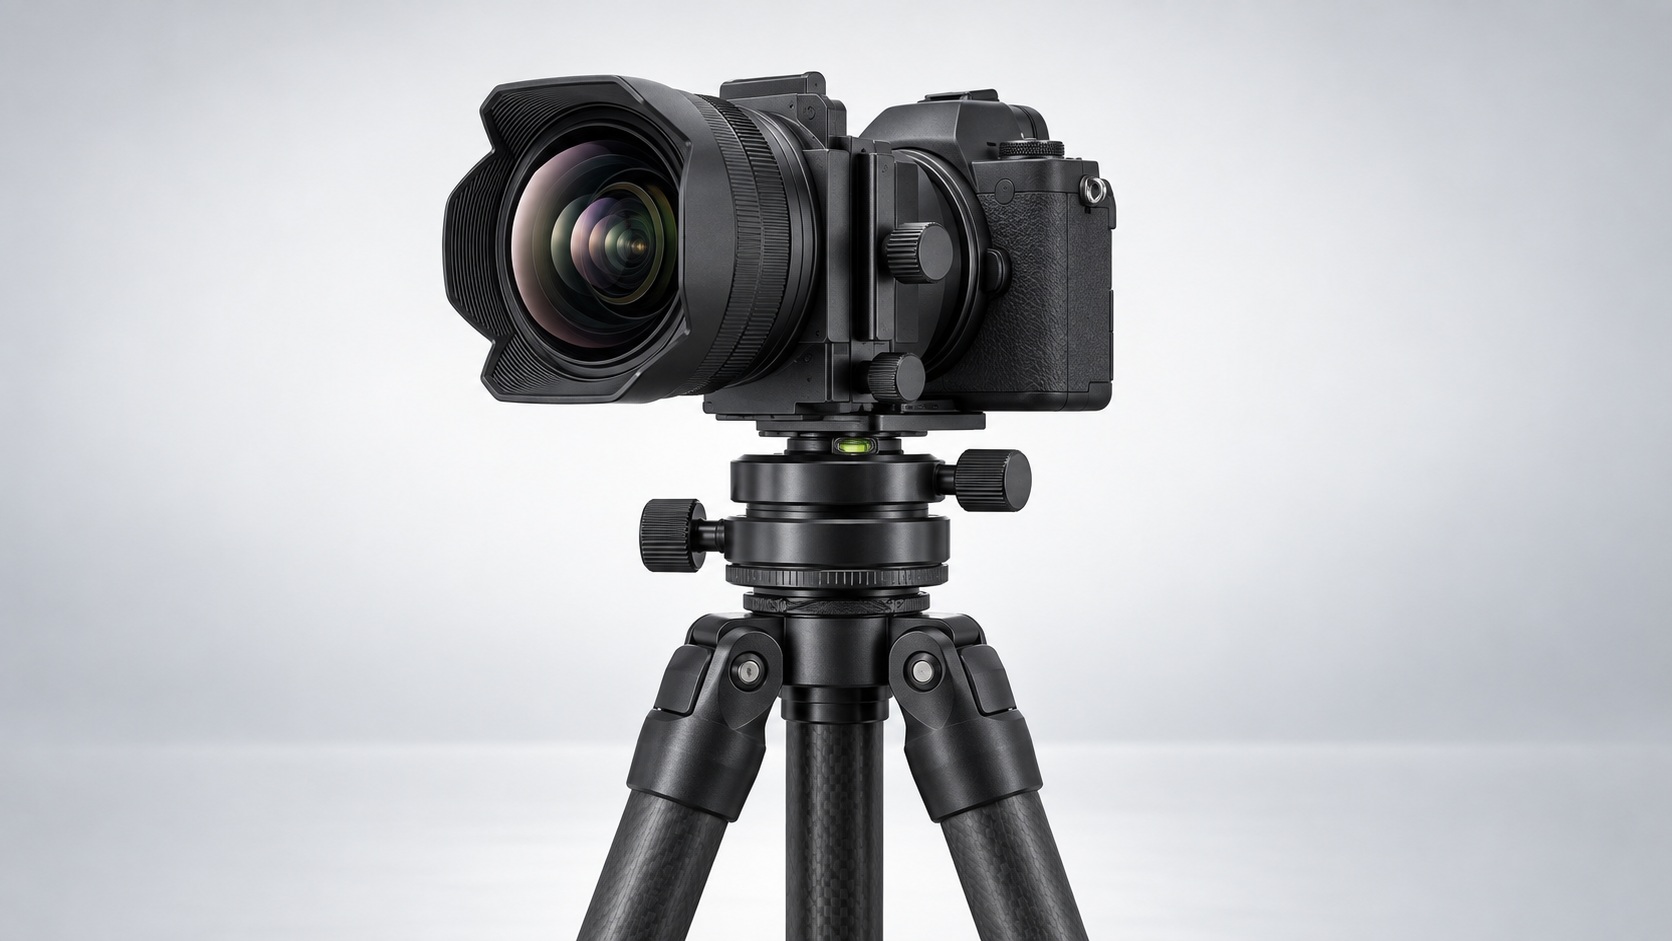
A tilt-shift lens keeps verticals parallel without tilting the camera, something software cannot do. The camera stays level while the lens moves, not the body. Tilt, which is the inclination of the focal plane, is rarely needed in architecture. What you are really paying for is the shift.
Shift vs. post-processing correction: the numbers
To straighten a facade, Lightroom and Capture One stretch the upper part of the image and then crop the remaining empty edges. You lose approximately 15 to 25% of the frame. The worst damage occurs in the top corners: pixels are reconstructed via interpolation and lose sharpness precisely where the wide-angle lens is already softer.
With shift, nothing is cropped and the corners remain as the lens renders them. Those who prefer to correct in post have more room to work with a high-resolution camera body. A Sony A7r Mark II, currently available for 800 euros on ReflexMania, starts at 42 MP and retains 32-36 MP after cropping.
Adapting an EF tilt-shift to Sony and Canon RF
Shift lenses are manual focus, so the adapter does not need to handle any autofocus. The electronic viewfinder, with magnification and focus peaking, actually makes focusing more precise than on a DSLR. The critical point is the aperture: on the Canon TS-E 24mm f/3.5L II and TS-E 17mm f/4L it is electromagnetic, and with a contactless ring it remains fixed at full aperture. You need an adapter that transmits the command: the Canon EF-EOS R on RF mount, a Metabones or a Sigma MC-11 on Sony. The Samyang T-S 24mm f/3.5 has an aperture ring and works with any ring. The Nikon PC-E 24mm f/3.5D also has an electronic aperture: it is best kept on a Nikon body.
On Canon, a Canon EOS RP with the EF-EOS R ring controls the aperture of the TS-E and records its data in the EXIF.
Who should buy it and who shouldn't
A used Canon TS-E 24mm II costs between 900 and 1,200 euros, while a Samyang T-S 24mm ranges from 400 to 500. These prices are only justified if the lens is frequently in use.
- It makes sense if you shoot at least 4-5 architecture jobs per month, deliver files for print or editorial use, and photograph tall facades from narrow streets.
- It doesn't make sense if you shoot apartments for real estate portals. At 2,500 px on the long side, the loss of crop is not visible, and adjusting the shift manually for every framing extends a 30-shot job.
- To try it out, there is the Samyang: you can find out if this way of working suits you without spending a thousand euros.
If you sell online only, those €900–1,200 will yield a better return invested in a serious tripod and a zoom wide-angle lens. Buy the tilt-shift lens later, once your clients start asking for it.
The camera body: what really matters and what you don't need to pay for
For interiors and facades, a camera body from ten years ago is sufficient, provided it has the right features. There are four of them:
- Resolution: correcting verticals costs pixels, and the more you start with, the more you have left.
- Dynamic range: essential for keeping both the shadowed room and the window in frame.
- Auto bracketing: prevents you from touching the camera between shutter counts.
- Grid and level clearly visible in the viewfinder or on the display.
Burst mode, subject tracking autofocus, 4K video, and in-body image stabilization are not needed here: you pay for them and never use them.
High-resolution full frame for architecture
The Sony A7r at 700 euros has 36 MP. Even after heavy perspective correction, the file remains around 27 MP, which holds up for editorial printing. Its limitation is the shutter: noisy and lacking an electronic first curtain, it causes shutter shock at intermediate speeds. In interiors, you work with exposures of half a second or longer, making the issue negligible. In bright outdoor conditions, however, you must check files at 100%.
The Sony A7r Mark II at 800 euros features 42 MP and the first electronic shutter, which eliminates shutter shock. Those working exclusively in real estate can stick with the Sony A7 Mark III at 700 euros: it has 24 MP, but recovers shadows near windows very well.
Affordable full frame: Canon EOS RP and Sony A7
We currently have 9 units of the Canon EOS RP in stock, ranging from 534 to 600 euros. It features a 26 MP sensor and a tilting display, which is convenient when the camera is positioned at 1.3 meters. It comes with the RF 16mm f/2.8 lens and, with an adapter, supports the entire EF lens lineup. For Sony, we have the first-generation Sony A7 at 400 euros and the Sony A7 Mark II at 570 euros. Both offer 24 MP, which is sufficient for real estate portals even after leveling corrections. The 170 euro price difference between the two models primarily covers in-body stabilization, which is not necessary when using a tripod.
APS-C for those who photograph their own properties
The Canon EOS R100 at 340 euros and the Sony A6000 at 360 euros, with a 10-18mm lens, cover almost all residential interiors. The Sony a6500 at 600 euros and the Fujifilm X-H1 at 650 euros add in-body image stabilization. Sony claims 5 stops, Fujifilm up to 5.5, measured according to the CIPA standard under ideal conditions.
In theory, handheld, you can go from 1/30s to about one second. In practice, at the counter, we often see a couple of stops less. On a tripod, the stabilizer should be turned off, as it can introduce micro-movements during long exposures. That's an extra 240-310 euros for a feature that remains off in this type of work.
Bodies we do not recommend for this job
The Sony A7s Mark II at 800 euros is excellent for video and low light. Its 12 MP, however, drop to 9-10 after cropping: enough for web use, but leaving no margin for prints or crops. At the same price, the A7r Mark II offers 42 MP.
The Canon EOS R50 V at 550 euros is designed for video content creators: no viewfinder, controls oriented towards shooting. Compared to the R100, it adds a vari-angle touchscreen, useful with a low tripod, but for indoor photography, the extra 210 euros mainly pay for video features that are not used here.
Tripod, head and level: the accessories that matter more than the lens
A kit 10-18mm on a stable, leveled tripod produces better interiors than a 16-35mm f/4 mounted on a head that slips by half a degree. Every tilt error becomes a falling vertical to correct and a piece of the photo to crop. The tripod must lift the camera body to 1.2–1.5 m with the center column almost closed. The center column is for fine adjustments, not for gaining height.
Ball head vs. geared head
The geared head features a knob for each axis. Turn the tilt knob, and the camera moves by as little as one degree while the other two axes remain fixed. With a ball head, you loosen a single lock and everything moves together, so every adjustment risks ruining the level horizon you just set. A used Manfrotto 410 Junior costs approximately 130-200 euros. The ball head is suitable for fast real estate shoots, such as 30 shots in an hour. For architecture, where you spend ten minutes on each framing, you need the geared head.
Level, L-plate and remote shutter release
They cost between 15 and 80 euros each and cut post-production work in half:
- Slide-in bubble level (15-20 euros): the two-axis model shows both the horizon and the forward tilt. A bubble on the tripod base is instead used to level the head before composing.
- L-plate (30-80 euros): to switch to vertical, you move the camera to the other side of the plate without flipping the head. The optical axis remains above the tripod and the framing does not shift. Almost all are Arca-Swiss: on the 410 Junior, which has a Manfrotto mount, an additional clamp is required.
- Remote shutter release (15-30 euros for the cable, free if the camera has an app): alternatively, there is the 2-second self-timer, which gives time to dampen the vibration of the finger on the button.
The electronic level on the body helps, but on many models it only measures lateral tilt. The forward tilt, which causes verticals to fall, remains unmonitored.
What to check on a used tripod
A tripod has no electronics, yet it wears out precisely where precision matters most:
- Extended legs: extend to the maximum and push the head to the side. Play in the joints becomes noticeable during long exposures.
- Locks: the levers loosen, but are often adjustable with a screw. The knobs suffer from sand and dry grease, and if they spin freely, the section slips under load.
- Plates: many proprietary plates are discontinued. If one is missing, check before buying that it is still available and at what price.
- Threads: 1/4" and 3/8" screws must screw in smoothly, without sticking.
- Rack: if reversing the direction causes the knob to spin freely before moving the camera, the teeth are worn.
For choosing a tripod in general, we refer to the guide on essential equipment for landscape photography: what it says about load capacity and materials also applies here.
Indoor lighting: bracketing, flash, and filters
In a room with a south-facing window, the difference between the shadowed wall and the sky outside can easily exceed 10 stops. A single shutter count rarely captures this range without blowing out the windows or filling the corners with noise. There are three solutions, and none of them require expensive gear.
Bracketing and merging: the most cost-effective method
On the Canon EOS RP, AEB is set from the exposure menu: 3 shutter count at 2 stop intervals, i.e., -2, 0, and +2. With the 2-second self-timer, the camera body captures the complete series automatically. If the window is in full sun, take a second series by shifting the exposure compensation by -3 stops.
The Sony A7 Mark III reaches 5 shutter count at 2 stops and features much more recoverable shadows. In practice, where the RP requires a second series, the Sony often needs only 3 shutter count. Fewer shutter count means fewer ghosts when moving a curtain. Allow 5-8 minutes per room, then the blending is done in batch in post.
A used flash is worth more than a new lens
A used manual speedlite costs between 60 and 120 euros. Aimed at a white ceiling, it turns the ceiling into a huge diffuser and brightens the room without hard shadows. This is the basis of flash blending: one shot with ambient light, one with the flash, then they are blended at the levels stage, keeping the clean colors of the flash and the atmosphere of the environment.
There are two main limitations. A wooden or colored ceiling reflects its hue across the entire room, rendering the bounce light unusable. Additionally, the flash does not mix well with warm 2700-3000 K bulbs when used near daylight. Either turn them off or attach a CTO gel to the reflector.
Polarizer and ND: when they are truly needed
The six-filter kit sold as essential for architecture stays in the bag when shooting interiors. The ones that actually work are two:
- Polarizer: removes reflections from glass, glossy parquet, and kitchen countertops. Outdoors, with lenses under 24mm equivalent, it darkens the sky in irregular bands.
- 10-stop ND: only for facades with pedestrians or traffic. On an overcast day, you can reach 15-30 seconds; people walking disappear, while those standing still remain.
Before buying, check the diameter. The Canon EF 16-35mm f/4L IS requires 77mm, while the 16-35mm f/2.8L III requires 82mm: a good polarizer in these sizes costs as much as a used flash. The Nikon 14-24mm f/2.8G and the Canon EF 11-24mm f/4L have a bulged front element and do not accept screw-on filters. Dedicated filter holders are required, which cost more than the filters themselves.
Buying used wide-angle and tilt-shift lenses: the checks to perform
A used wide-angle lens is judged by its corners, not its center. At the center, almost every lens remains sharp even after a drop. At the edges, however, flaws become visible, and it is precisely there that in interior photography door frames and edges end up.
The corner test for decentering
Decentration is an optical element that has shifted off-axis, almost always after an impact. It takes just five minutes to detect:
- Choose a flat wall with a fine texture: bricks, rough plaster, a full bookshelf.
- Mount the camera body on a tripod with the sensor parallel to the wall. The electronic level must be at zero and the horizontal lines must remain parallel to the frame edges.
- Set f/8, base ISO and a 2-second self-timer, then focus in the center.
- On zoom lenses, take one shot at the minimum focal length and one at the maximum.
- Compare the four corners at 100%.
A slight softness at the edges is normal on any wide-angle lens, but it is symmetrical: all four corners lose sharpness in the same way. De-centering breaks this symmetry, with one corner or an entire side being noticeably worse than its opposite. On a shift lens, repeat the test with the shift at full travel, first up and then down. The two shutter counts must degrade in a mirror-image fashion.
Shift and tilt mechanics
On a tilt-shift, the mechanics matter as much as the glass, and repairing them is costly. A healthy shift lens:
- moves smoothly through its entire range, with no stiff spots or lateral play;
- stays firmly in place when the locking knobs are tightened, even with the camera pointed upwards;
- rotates with precise clicks and does not shift from the selected position;
- features legible scales, and zero corresponds to the centered image.
A shifting lens that sticks should be rejected, even at a good price. If the front element is misaligned, the framing shifts between bracketed shots, and the fusion no longer aligns. Then check the aperture: ten consecutive shots at f/16 on the same wall must all have the same exposure. If they don't, the blades are slow, often due to oil. On bulging front elements, like that of the TS-E 17mm, a deep scratch creates flare, especially in backlight against windows.
What we do in our lab
At the counter, we perform these checks on every lens that arrives at ReflexMania. We test the corners on the test wall and check the movement of tilt-shift lenses stroke by stroke. Then we inspect the lenses against the light to look for fungus, haze, and dust. For camera bodies, we add the certified shutter count. All used equipment comes with a 2-year warranty. On a tilt-shift lens, where a mechanical defect can surface after months, the warranty is worth more than the 50 euros saved by buying from a private seller. The backlit inspection applies to any lens, and we explained it step by step in our guide on how to check for fungus, dust, and scratches on used lenses.
Three used kits for three budgets
We see these three configurations working every week at the counter. They range from the real estate agent who photographs their own listings to the photographer delivering to an architecture studio. The prices for camera bodies are current on ReflexMania. Lens and accessory prices are indicative market ranges for used items in excellent condition.
| Kit | Body (ReflexMania price) | Lens (used range) | Accessories (used range) | Indicative total |
|---|---|---|---|---|
| Basic Real Estate | Canon EOS R100, from €340 | RF-S 10-18mm: €180-230 | Tripod and level: €100-150 | €620-720 |
| Basic Real Estate Sony | Sony A6000, €360 | E 10-18mm f/4 OSS: €350-450 | Tripod and level: €100-150 | €810-960 |
| Full frame | Canon EOS RP, from €534 | EF 16-35mm f/4L IS: €550-650 + EF-EOS R adapter: €80-120 | Tripod and rail head: €250-350 | €1,400-1,650 |
| Architecture | Sony A7r Mark II, €800 | Samyang T-S 24mm: €400-500 + optional EF–E ring | Tripod, rail, L-plate, level: €300-400 | €1,500-1,750 |
Basic real estate under 800 euros
The Canon EOS R100 starts at 340 euros, and we currently have 9 units in stock. Paired with the RF-S 10-18mm, it covers a 16-29mm equivalent range, which is all you need for indoor photography. The main limitation is the fixed, non-touch display: when using a low tripod, you will have to bend down. If you prefer to stick with Sony E, you can get the Sony A6000 for 360 euros, bundled with the Sony E 10-18mm f/4 OSS. However, the lens is more expensive, bringing the total kit price to 810-960 euros.
- It is for those who photograph 3-10 apartments per month for portals.
- It is not for those who shoot building facades or print in large format.
Full frame for real estate and outdoor photography
The Canon EOS RP ranges from 534 to 600 euros, and we have 9 in stock. Paired with the adapted EF 16-35mm f/4L IS, it becomes the kit with the best value for money: sharp corners at f/8 and a tilting display for low-angle shots. Budget for two spare LP-E17 batteries, as a single one is not enough for a full day of site inspections.
- This is for those who alternate between indoor and outdoor shooting and want a system to grow with.
- This is not for those who take two apartment photos a month: on the portal, the difference from the basic kit is not visible.
Architecture with decentering
The Sony A7r Mark II at 800 euros delivers 42 MP. With the Samyang T-S 24mm, verticals are corrected in-camera without any cropping. We currently have only one unit in stock. Keep three or four NP-FW50 batteries in your bag, as battery life is its weak point.
- It is for those who work with architecture studios or produce images for publishing.
- It is not for high-volume web real estate, where every off-center framing costs minutes that no one pays for.
Frequently asked questions
Is an APS-C sensor sufficient for photographing apartments for sale, or is a full frame necessary?
For photos intended for real estate portals, a 24 MP APS-C camera like the Canon EOS R100 or Sony A6000 with a 10-18mm lens is sufficient. Full frame is needed if you also shoot exteriors in difficult conditions, make prints, or want more room to correct verticals in post.
What focal length to use for interiors without distorting the rooms?
Between 16 and 24mm full-frame equivalent, i.e., 10-16mm on APS-C. Below 14mm full-frame equivalent, vertical lines and walls stretch at the edges and spaces appear larger than they actually are, leading to disappointing visits for the buyer.
Is a tilt-shift lens essential for architectural photography?
No. For web images, correcting verticals in post-production is sufficient. Tilt-shift becomes worthwhile if you consistently work on facades and prints, where losing 15-25% of the frame and the loss of sharpness in the corners really matters.
Can I mount a Canon EF tilt-shift lens on a Sony mirrorless camera?
Yes, with an EF-Sony E adapter. Since these are manual focus lenses, adaptation does not cause autofocus issues; however, for Canon TS-E lenses, an adapter with electronic contacts is required to control the aperture.
Is in-body image stabilization useful for shooting interiors?
If you are working on a tripod, no; in fact, it should be disabled to avoid micro-movements. It is only useful if you are shooting handheld in dark environments, but for real estate interiors, the tripod remains the correct choice.
What to check before buying a used wide-angle lens?
Decentering, by photographing a flat wall at f/8 and comparing the four corners, then fungus and dust between the lenses, scratches on the front element, especially if convex, and the smoothness of zoom and focus. On tilt-shift lenses, the mechanics of the movements must also be checked.
How much does a used complete kit for real estate photography cost?
Around 700 euros with a Canon EOS R100, Canon RF-S 10-18mm, tripod, and level. With a full-frame camera like the Canon EOS RP and a 16-35mm f/4 lens, the cost rises to 1,400–1,650 euros, including a geared head.
Want to build your architecture and real estate kit? Let's talk
If you have questions about a purchase or need advice for your specific case, contact us. We offer free advice because we are photographers first and sellers second, and because a customer who makes a poor purchase will not return to photography.
Three ways to get in touch:
- Contact form — response within 24 business hours
- WhatsApp at 342 362 3454 (messages only)
- Phone: 071 291 6347 (Mon-Fri 9-13/15-18, Sat 9-13)
And if you want to see what we have in stock right away, explore the used gear available today: every camera is certified, comes with a 2-year warranty, and ships within 24-48 hours.
Article written by Matteo for the ReflexMania Team. Last updated: September 2026. Prices and availability as of the time of publication.